Posts

Showing posts with the label flowers

Daisy & Chicory Envelope Card

Image
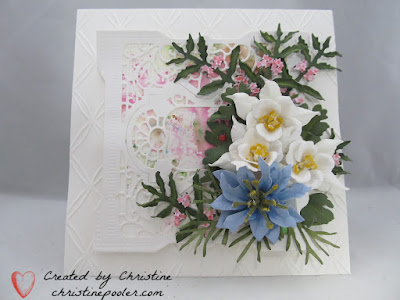
Hello my crafty friends welcome to my blog. Today I have an envelope card that I created and decorated with Susan's Garden Note Daisies, Ferns, Chicory (created from Susan's Garden Notes Aster die set) and Jasmine. Susan did the envelope card a couple of weeks ago on her Garden Club Live found here .  Another good video for making the envelope card is by Sam Calcott it can be found on YouTube here . From white soft finish cardstock created envelope and card base.  Used pattern paper to decorate envelope.  (An old Close to My Heart Paper used here)  I stamped  quote in black then used some little blotchy stamps with black ink to decorate inside of my card.  Close to My Heart stamp set - A Million Little Things was used. Created 4 Susan's Garden Notes Daisies, 6 asters (cut from blue cardstock), some Jasmine and ferns - Ladder and Maidenhair.  A few small branches were tucked in arrangement. To create the chicory I cut off the very ends of the asters the...
Happy Bouquet

Image
Hello My Crafty Friends, Today I have a card I created using  Susan's Garden Club Columbine, Beauty Berry Bush and Garden Notes Love In A Mist along with Spellbinders Vintage Treasures by Becca Feeken. Card base is 6" X 6" created from 110# Cardstock then embossed front.  The embossing folder was found on Amazon. Background piece was from my stash and die cut with the frame lit in Vintage Treasures die set. From white cardstock Vintage Treasures was die cut background was attached to back of main die cut using Kids Choice Glue.  Dimensional tape was used to adhere to card front. Several Beauty Berry Bush were cut from green cardstock flowers cut from pink cardstock then shaped and assembled. three Columbine were cut from white cardstock shaped and assembled as well as one Love In A Mist cut from blue cardstock leaves from green cardstock. Once flowers were where I wanted them they were attached using Kids Choice Glue. Hope my card has inspired you to create.  Thanks ...

Forget Me Not

Image
Hello My Crafty Friends, Warm weather has finally arrived here in Maine and it sure feels great.  I have been getting all my pots, window boxes, bicycle, wagon washtubs etc filled with lots of annuals now to keep everything watered. The Forget Me Nots are in bloom and how pretty they are here in Maine the spring flowers are really beautiful.  Today my card has the Forget Me Nots along with the Pom Pom Dahlia and the Ostrich Fern. The Ostrich Fern,which are now starting to unfurl, are a spring time treat around here. When it first comes up and is still tightly coiled they are "Fiddleheads". Many people start harvesting them and selling them roadside people steam them are said to be quite tasty and loved by many (not me). I don't mind harvesting if the black flies are not too bad. My card is a 5" X 7" A dot embossing folder was on front. Beccka Feeken's die set Nobel Chatelaine Etched was used to cut decorative pieces a solid green for backing and white overla...

Potted Orchid

Image
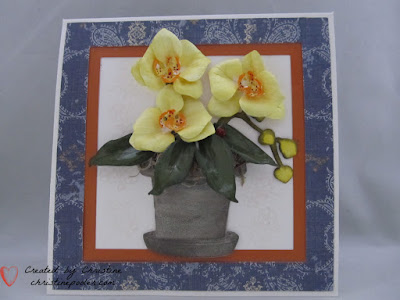
  Hello my crafty friends! Today I have a card I created per request of a friend.  Susan's Garden Notes Phalaenopsis (Moth Orchid) is the flower in Susan's Garden Notes Potted was used along with Fitted Stitch Frame It Square dies. Susan has a video on her Facebook page Susan's Garden Club for the orchid. You can find video here  6" X 6"  bright white card blank. Patterned paper cut to 5-3/4" X 5-3/4" die cut square in center. Burnt Orange cardstock cut 5-1/2" X 5-1/2" next smaller square cut in center.  Using clear double sided adhesive attach patterned paper over orange cardstock lining up so it is even all around then adhere to card front using clear double sided adhesive. Cut 2 pots from cardstock with clear double sided adhesive on back - 1 from gray card stock 1 from white soft finish cardstock. Adhere white on top of gray one.  Using alcohol markers color and shade.  Remove protective backing add couple of dimension squares lower center ...

Cheery Pom Pom Dahlias

Image
  Welcome my crafty friends, Today I have a colorful card that could be used for several different occasions.  Once again I had seen a picture posted on Facebook that inspired me to make some of Susan's Pom Pom Dahlias.   Look around there are so many places to find inspiration for a card.  Here is the inspiration picture. Here is how I created my card. Card base 6" X 6" - Craft Perfect White Card Base used here. Cut colored cardstock 5-3/4" square attach to card front using Clear Double Sided Adhesive. Cut White Soft Finish Cardstock 5-1/2" square attach to card front using Clear Double Sided Adhesive. Spellbinders Grand Decorative Ovals - smallest was used to cut a decorative oval from white Soft Finish Cardstock. Create background piece 3-1/2" X 4" die cut using oval that will fit inside decorative oval then adhere in center using Clear Double Sided Adhesive.  My background piece was photo paper then colored with Brusho Powders. Vase was cut on Cr...

Pink Hydrangea & Feverfew

Image
Hello my crafty friends - Welcome to my blog, Today I have a card for you using Susan's Garden Lace Cap Hydrangea, Feverfew, Frame It Stitched Susan's Rectangle and Galvanized Tub . Here is how I created it. Step 1 Create a piece of background size to be determined by size rectangle used for cut out on card front..  My piece was created using several colors of Distress Oxide Sprays. Step 2   Create 6" X 6" card base.  Cut a rectangle upper left side of card front.  Susan's Garden Stitched Fitted Frame Rectangles were used but any rectangle die would do. Step 3   Cut background piece a little larger than the rectangle opening.  Adhere to back of opening using Clear Double Sided Adhesive . Step 4   Stamp made from Garden Notes Ladder Fern was used with green ink to stamp couple of ferns in area above tub so they would show above tub and flowers. Step 5   Cut 2  Galvanized Tubs with Clear Double Sided Adhesive on back.  Adhere 1 on t...

Lenten Rose 70th

Image
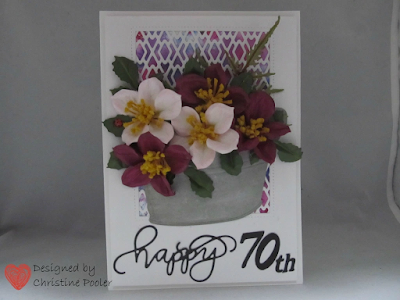
Hello my crafting friends, welcome to my blog! Today I have a card I created for a dear friend that has been my friend since childhood. Our birthdays are a week apart and we have been exchanging birthday cards for many years. My card was created using Susan's Garden Club Helleborous, Japanese Painted Fern, Galvanized Bucket, Tonic Studios - Patterned Panels - Deco Diamonds and Nuvo Shimmer Powders . Step 1 Using Craft Perfect Watercolor Paper and Nuvo Shimmer Powders in colors of your choice sprinkle powders onto watercolor paper lightly spritz with water continue until you like the results. Set aside to air dry. Cut to size of diamond panel. Step 2 From white cardstock die cut 1 Deco Diamond Panel . Step 3 Cut 1 piece of white cardstock 4-3/4" X 6-3/4" then using a rectangle die just a little smaller than the diamond panel cut rectangle in upper portion of cardstock. Step 4 Using Nuvo Deluxe Adhesive attach panel over the colored piece then center behind...

Tiny Treasure

Image
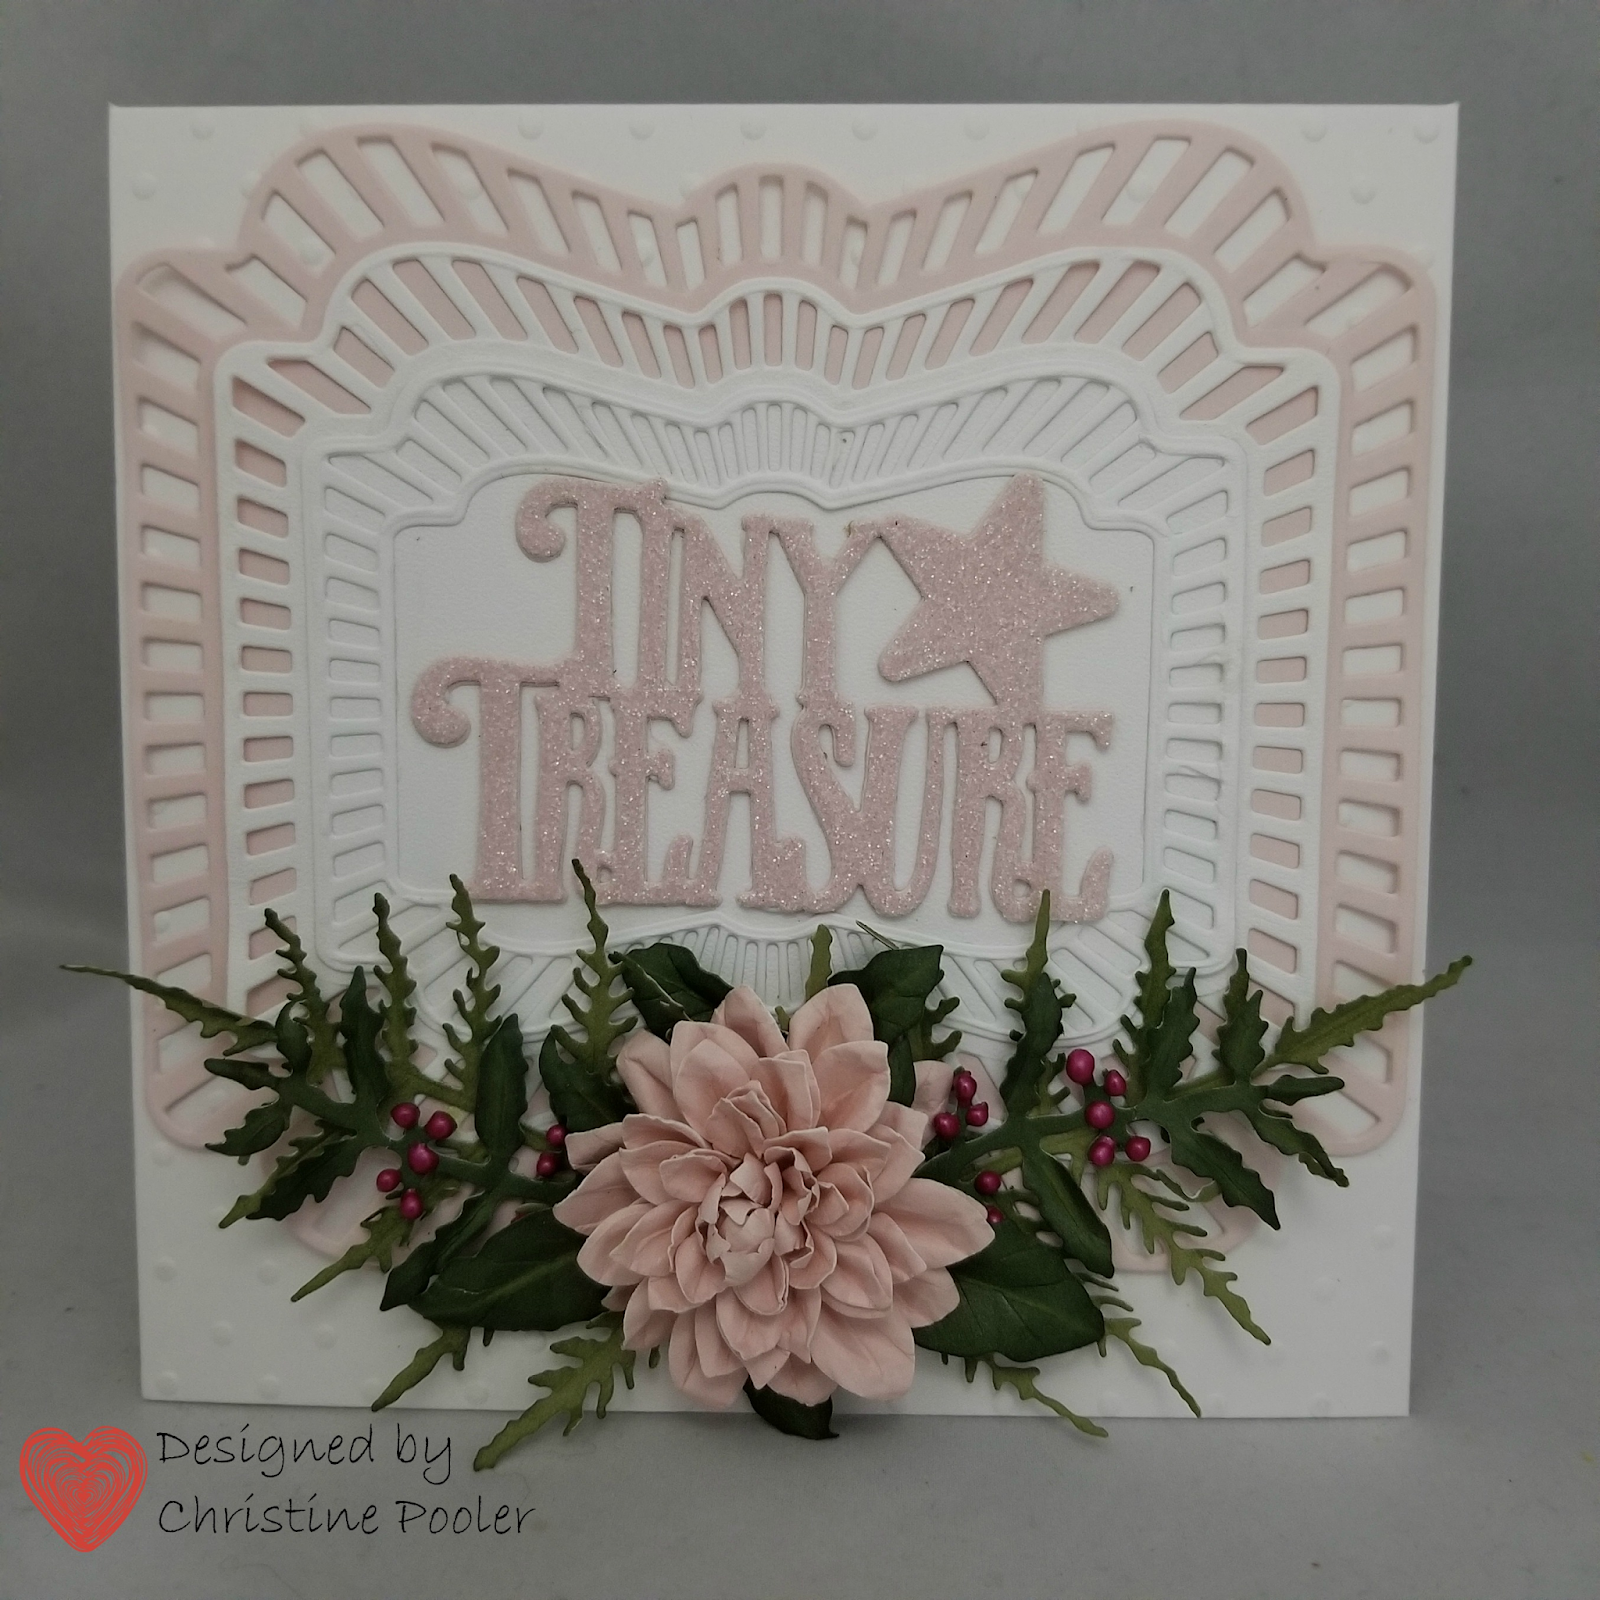
Hello My Crafty Friends, Weather here in Maine has turned cold and we have had a little snow - has gone now but I know that we could get the big one anytime so all gardening will be in paper for the next several months. Susan Tierney-Cockburn as many of you know has teamed up with Tonic Studios and has come out with her first release of flower dies under Tonic logo and they are beautiful as always. Tonic Studios has a lot of great supplies. Today my card is for a card I designed for a dear sweet friend that has just become a Mom for the first time - It's A Girl! Step 1   Cut 2 Beauty Berry Bush from green cardstock.  Shade with ink shape leaves.  Using Nuvo Crystal Drops - Plum Pudding add berries to branches set aside to dry.  When dry add berries to back side set aside to dry. Step 2  Cut 3 layers graduated in size ( Tonic's Memory Book Maker Layered Cascade Die Set used here) colors of your choice. Step 3   Using Tonic 6" X 6" White Card Base...

Echinacea Hugs

Image
Hello my crafty friends, Having such fun with Susan's new dies and Tonic products.  Today I have used Susan's Garden Club dies Echinacea, Japanese Painted Fern and Ladybug & Stems .  I played with the two colors that I have of Nuvo Mica Mist for a background. Card base is 6" X 6" using black cardstock cut 6" X 12" scored at 6" fold to form card. Added 5-3/4" square Pearlescent Cardstock - Ivory Sheen using Nuvo Tape Runner Using 5-1/2" square of black cardstock put into a cardboard box (to protect area from over spray) spray Pecan Peach Mica Mist let dry (it dries quickly) then spray Nuvo Wild Olive .  Once dry adhere to card front using Nuvo Tape Runner . Using Susan's Garden Club Echinacea die cut 5 sets from white cardstock. Using Copic markers color flowers I did 3 in orange and 2 in yellow. Shape and put together using Nuvo Deluxe Adhesive .  Cut florets from brown card stock using a toothpick cup each then adhere to c...

Tub of Spider Mums

Image
Welcome my crafty friends, Susan's new dies are so much fun.  Several of my cards have been done for a while hence I do not have all the particulars that I did as I was having so much fun playing with the dies I forgot to write info down.  Going forward I will try to do better but I get playing and get lost in what I am doing. Today my card uses Susan's Garden Spider Mum , Tub and Japanese Painted Fern .  Susan is now with Tonic Studios and boy do they have lots of wonderful product. The Tonic 6" X 6" white card base is used then colored cardstock cut 5-3/4" square added to card front.  From white 5-1/2" square cardstock a circle was cut in upper left of the piece.  You can use any background behind the circle but what I have used was an actual picture printed on white cardstock of my little building (which we call the basket shop as I use to make baskets there). My tub was cut twice adhered together then colored with Copic markers and metallic rubs th...

Columbine on Stained Glass

Image
Welcome my crafty friends, Another card using Susan's new release with Tonic .  Today I have featured the Columbine and one of my favorite perennials these are 2 of the colors I have. Tonic's 6" X6" white card base layered with green cardstock 5 - 3/4" square.  White cardstock cut 5-1/2" square the upper corner was cut using a die from my stash and bottom edge was cut with old Martha Stewart Punch.  Before adding to card front I cut a piece of white cardstock that was a little bit larger than the stained glass cut out.  Distress Oxide Sprays were used to color background then attached behind the cutout.  Add to card front. Using the new Susan's Garden Columbine die 5 flowers were cut from white cardstock then colored with Copic Markers.  They were shaped and put together using Nuvo Deluxe Adhesive . From green cardstock Japanese Painted Ferns were cut,color, shape adhere to right side of card front.  Add some berries (mine are old berry branches I ...

Diamond Survivor

Image
Hello my crafty friends, It has been a couple months since I last posted time has flown by. As a lot of you know Susan Tierney Cockburn has joined Tonic Studios and yesterday they had a launch of her 1st release of her beautiful flower dies  under the Tonic Studios Logo on Create & Craft .   I am so excited to once again be a member of Susan's Design Team I feel honored to represent her. My post today features a few of those dies. As you know October is Breast Cancer Awareness month and so my card was designed for a friend that is a breast cancer survivor. My card is 6" X 6" I used Tonic's card base. Embellishment Mousse (Spring Green) was used along with their Stencil Twisting Circles to create background in center. Pink cardstock was cut 5-3/4" square and Diamond was cut in center.  Next white cardstock was cut 5-1/2 square and Diamond was cut in center of it using next larger size.  These were layered over the background on card front. Japanese ...

More Sympathy Cards

Image
  Welcome my crafty friends, It has been a long time since I posted and I am sorry but it just has been a crazy summer.  I do hope that you are all enjoying your summer. I have worked on cards but just haven't taken the time to post and unfortunately these cards do not have tutorials but I have links to the products I used so you just have to click on the picture and it will take you to the site.  If you have questions on how I did something please message me and I will gladly respond. For those of you who don't know Susan's Garden has gone to Tonic Studios and she will have a new release of dies in September and she has asked me to be on her Design Team which I feel honored as well as excited and of course I accepted so be sure to keep checking back she has some great dies coming. Thank you for stopping by today and until next time Happy Crafting! Christine

Sympathy Cards

Image
Welcome my crafty friends! Just a quick post today.  Today I have 3 sympathy cards I created using some of Susan's Garden Notes dies.  I have not done tutorials but they are very simple to do.  Because sympathy cards are usually not a planned thing it helps if you have a few flowers ahead so a card can be created in a timely manner.  These cards all have the Garden Notes Love In A Mist which I love to make. Card 1 has a background paper that I made myself by printing off a picture I had taken of old wallpaper. Card 2   the colorful oval was done with coffee filter and powder water colors. Card 3   the colorful image was done using Distress Oxide Inks. Thanks for stopping by and until next time - Happy Crafting! Christine   Elizabeth Craft Designs Supplies

Purple Callas

Image
Hello My Crafty Friends, The weather here in Maine has started to cooperate a little so much of my spare time has been spent outside digging and planting until I can't stand the black flies driving me back inside. Today I have a card that I created which was inspired by a bouquet I saw at the florist shop.  The lady ahead of me was picking up flowers for a wedding and when I saw the gorgeous Calla Lilies I knew I had to try and recreate them in paper. Here is how the card was created. Step 1   Using white Soft Finish Cardstock form 6" X 6" card base. Step 2   From same cardstock cut piece 5-3/4" square.  Using embossing folder of your choice (I am sorry I do not know the name of mine I have had it for sometime) emboss cardstock.  Using Clear Double Sided Adhesive adhere square to card front. Step 3   From green cardstock cut several ferns using Garden Notes Ladder Fern .  Add using using distress ink.  To add dimension use tweezers from Garden N...

70th Birthday Calla Lilies

Image
Welcome My Crafty Friends! Wow it has been more than a month since my last post as we have had a lot going on. As we all know life does get in the way of our crafting sometimes but I am back now and it seems great.  I have really missed making cards but there was just no time. My card today uses Susan's Garden Notes Calla Lily, Cosmos, Ladder Fern and Stitched Rectangle Frame It along with Elizabeth Craft Designs Stitched Fishtail Banners .  My little background feature was done using Brusho Watercolor Powders and coffee filter. Here is how I created my card. Step 1   Create background piece using glossy photo paper, coffee filter and watercolor powders Susan has a video on her Facebook page Susan's Garden Club found here Step 2   Form 6" X 6" card base from 110# white Soft Finish Cardstock . Step 3   Cut white Soft Finish Cardstock 5-3/4" square.   Using Garden Notes Frame It/Stitched Rectangles cut rectangle on right side using size of your ch...

With Sympathy Flame Lily

Image
  Hello my crafty friends - Welcome! Still snow here in Maine so no outdoor gardening so I get to do more paper gardening which I love.  As I get older I am finding I enjoy the paper gardening more than outdoor as it is easier on my back. My card today uses Susan's new Garden Notes Flame Lily again along with great fillers Garden Notes Feverfew 1 and Maidenhair Fern . Here is how card was created. Step 1   From white  110# Soft Finish Cardstock form 6" x 6" card base. Step 2   Cut patterned paper 5-3/4" square ( ModaScrap Wood Effects used here).  Adhere to card front using Clear Double Sided Adhesive . Step 3   Cut frame from green cardstock using 2 largest dies from Elizabeth Craft Designs Stitched Hexagons .  Line dies up making sure they are even all around use removable tape to hold together while die cutting.  Using Clear Double Sided Adhesive adhere frame to card front 1/4" down from top. Step 4  From white Soft Finish Card...

Plant Smiles

Image
Hello my crafty friends welcome to my blog. Here in Maine we are still waiting for spring weather to take away the snow so until then the only gardening I can do is paper gardening.  Today from my paper garden I have a card I created for you using more of Susan's Garden Notes new releases.  This card has the new Garden Notes Heart Grapevine Wreath, Ranunculus and Calla Lily . Here is how card was created. Step 1   From green cardstock cut 2 Garden Notes Leafy Berry Branch .  Using Distress Ink shade.  Using Molding Pad and Medium Ball Tool from All Metal 4 pc. Tool Kit shape leaves.  Using Nuvo Crystal Drops add berries set aside to dry.  When dry add berries to back side let dry. Step 2   Form 6"x6" card base using large embossing folder emboss card front only. Step 3   Cut 2-4 Garden Notes Heart Grapevine Wreaths from brown cardstock.  (I used 4 on this card)  Stack wreaths using Kids Choice Glue sparingly so as not to glue tw...

Watering Can with Calendula

Image
Welcome my crafty friends, Today I have created another card using Susan's new Garden Notes Watering Can and Garden Notes Calendula .  If you couldn't tell I love watering cans the picture in circle is actually part of my collection that I have. Here is how card was created. Step 1   Form 6" X 6" card base using white 110# Soft Finish Cardstock . Step 2  Cut white 90# Soft Finish Cardstock 5-3/4" square.  Using 6th largest die from Garden Notes Frame It - Stitched Circles cut circle in cardstock approximately 1/4" in from left side and 1/4" down from top. Step 3   Choose patterned paper, picture or use inks to make a back ground then cut using 7th largest circle die.  Using Clear Double Sided Adhesive adhere behind opening then adhere to card front. Step 4   Using black ink stamp sentiment to lower left corner of card. Step 5   Cut 2 Garden Notes Watering Can from cardstock with Clear Double Sided Adhesive on back - 1 gray 1 white.  ...

Calla Lilies

Image
Welcome my crafty friends, Today my card features another new release of Susan's Garden Note - the Calla Lily .  I am really loving this new release of Susan's but I love all her releases. Here is how I created my card. Step 1   From green cardstock cut couple of branches using Garden Notes Hawthorne .  Add berries using Nuvo Crystal Drops set aside to dry then do back side. Step 2   Form card base 5" X 7" from white Soft Finish Cardstock (I like to use the 110# for card base). Step 3   The oval is a piece I had saved when I used the next to largest  Garden Notes Frame It - Oval ( never through those pieces away).  I used some Distress Oxide Inks to make a background on the oval.  Attach to card front using Clear Double Sided Adhesive . Step 4   Create 3 lilies cutting from white Soft Finish Cardstock (90#) using Garden Notes Calla Lily .  Cut leaves from green cardstock.  Shape using Susan's 4 pc. All Metal Tool Kit, Moldin...