Posts

Showing posts with the label Tonic Studios

Bachelor Buttons Hello

Image
Hello My Crafty Friends, Wow March 1st spring is around the corner at least I hope it is. Today I have a card for you it was inspired by a picture that I saw on Facebook.  This is the picture.  After Susan did these on her "Live" a couple weeks ago I decided it was time to make my card. Here is how my card was created. Step 1   Create 6" X 6" card base from white Cardstock  or use purchased one which you can find at Tonic Studios.  Cut colored cardstock (light green used here) 5-1/2" X 5-1/2" adhere to card front using Clear Double Sided Adhesive .  Cut white cardstock 5-1/2" X 5-1/2" emboss using embossing folder of your choice. ( Craftwell Delicate Dots used here) then adhere to card front using Clear Double Sided Adhesive . Step 2   Using Tonic Studios Verso Classic Quatrafoil die (2 pieces together) cut white cardstock.  Using white cardstock slightly larger than the Quatrafoil.  Using 2 colors of Nouvo Embellishment Mousse (Spring Gree...
Popping Valentines

Image
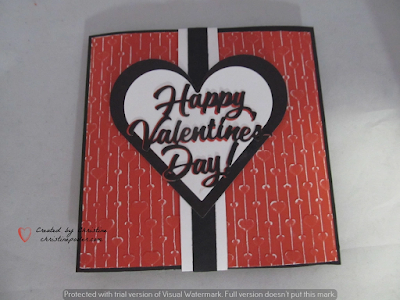
Hello My Crafty Friends, Here are a couple of Valentine's I created for a couple of young boys using Karen Buriston's dies. Such fun cards to make - Karen Burniston has great dies to make interactive cards. Thanks for stopping by today and until next time Happy Crafting! Christine

Nasturtiums & Forget Me Nots

Image
Nasturtiums & Forget Me Nots Hello My Crafty Friend, Today my card is a happier card it is a birthday card for one of my nieces. Tried a little foiling for the background of this card. Susan's older Garden Notes dies were used for the Nasturtiums, Forget Me Nots and Trevi Urn. Step 1 Form 4-1/4" X 5-1/2" card base - I used a yellow cardstock. Step 2 Cut black cardstock 4" X 5-1/4" using a stencil (Stampers Anonymous Mini Bricks used here), Transfer Gel and Foil ( Opal used here) make your background. Adhere to center of card front using Nuvo Adhesive Tape Runner . Step 3 Make a frame from white cardstock using 2 nested rectangles adhere over foiled piece using Nuvo Adhesive Tape Runner . Step 4 Die cut 2 Susan's Trevi Urns from white cardstock with adhesive on the back. Adhere one on top of the other. Color and shade. Shape a bit with your fingers add a couple pop dots on center lower back then adhere to lower center of card. Step 5 Using ...

Pom Pom Dahlia Courage

Image
Hello My Crafty Friends, Back today with an encouragement card for a sweet woman fighting cancer right now. Step 1 Form 6" X 6" card base. Tonic Diamond Corner Dot & Drop die was used for the 4 corners. Diamond Layering dies were used to cut center and frame. 6" X 6" green cardstock attached to back of card front. Step 2 Using Nuvo Vintage Drops - Dusty Rose add drops on corner swirls following pattern. For corners on frame add dots using more of the dusty rose and Nuvo Crystal Drops - Bottle Green . Set aside to dry. Step 3 die cut 1 Susan's Garden Club Pom Pom Dahlia from pink cardstock. Shade center shape and assemble using Nuvo Deluxe Adhesive. Step 4 Susan's Garden Notes Jasmine flowers were cut, shaded, shaped and assembled. Step 5 Tonic Verso Essentials Fallen Leaves die set was used to cut the long leafy branches then shaded and shaped. Step 6 Arrange your flowers and leaves at bottom of card front using Nuvo Deluxe Adhesive...

Hellebores in Tin

Image
Hello my crafty friends welcome to my blog. I do hope that your start to 2020 has been going well. Today I have a card that I created for a sweet friend's birthday. Step 1 Using Susan's Garden Holly & Berries dies set cut stems from brown card stock then add berries using Nuvo Crystal Drops Berry Red set aside to dry then repeat on back side. Step 2 Form card base by cutting white card stock 10" X 7" score at 5" fold on score line card will be 5" X 7". Step 3 Emboss card front Step 4 Die cut oval from water color paper. Using Distress Oxide Sprays of your color choice add to oval. Spray with Nuvo Glitter Mist . Once dry adhere to card front using Nuvo Tape Runner . Step 5 From white cardstock die cut 2 Susan's Garden Helleoborus shade and shape. Shade and shape leaves. Step 6 Die cut 2 Susan'sGarden Galvanized Bucket from gray cardstock which has double sided adhesive on back. Because I want more of cylinder shape I tri...

Lenten Rose 70th

Image
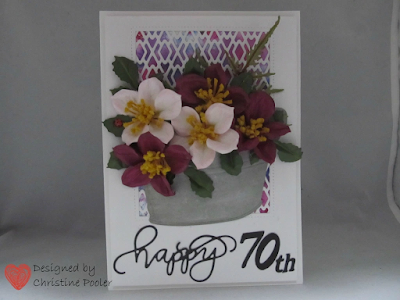
Hello my crafting friends, welcome to my blog! Today I have a card I created for a dear friend that has been my friend since childhood. Our birthdays are a week apart and we have been exchanging birthday cards for many years. My card was created using Susan's Garden Club Helleborous, Japanese Painted Fern, Galvanized Bucket, Tonic Studios - Patterned Panels - Deco Diamonds and Nuvo Shimmer Powders . Step 1 Using Craft Perfect Watercolor Paper and Nuvo Shimmer Powders in colors of your choice sprinkle powders onto watercolor paper lightly spritz with water continue until you like the results. Set aside to air dry. Cut to size of diamond panel. Step 2 From white cardstock die cut 1 Deco Diamond Panel . Step 3 Cut 1 piece of white cardstock 4-3/4" X 6-3/4" then using a rectangle die just a little smaller than the diamond panel cut rectangle in upper portion of cardstock. Step 4 Using Nuvo Deluxe Adhesive attach panel over the colored piece then center behind...

Snow Village

Image
Hello my crafty friends! This weekend is the Susan's Garden Club Dies etc has been released on Tonic Studio USA site. There are smaller bundles or the complete bundle that are on special all weekend November 22,23 and 24th . If you click on any product picture below it will take you to Tonic Studio USA site where you can find the bundles. Be sure to check it out. My card today I created using Nuvo Expanding Mousse , Winter Wonderland Stencil, Susan's Garden Club Spider Mum and her Holly & Berries . Sentiment is Tonic Studio- Let It Snow . Step 1 Cut Holly Berry Branch twice from brown cardstock. Adhere together using Nuvo Deluxe Adhesive . I did a bunch all at once then embossed them with a woodgrain embossing folder. I know it doesn't really show in picture but it does show in person. Shade with brown ink. Using Nuvo Crystal Drops - Red Berry add berries to branch then set aside to dry. Once dry add berries to back side again set aside to dry. Step 2...

Wagon Full of Holly

Image
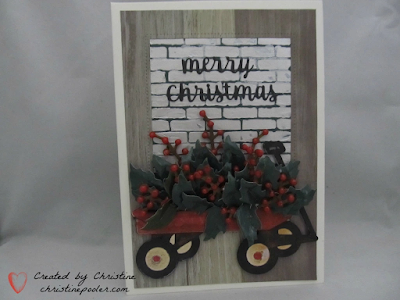
Hello my crafty friends, Wow Thanksgiving is next week and still need to get some Christmas cards done. Today my card is a simple card made using Susan's Garden Club Holly & Berry dies set from Tonic Studios and a little red wagon that has been laying around on my desk for quite some time now waiting to be used. it was cut on the Cricut. The bricks were made using a stencil I have had for a long time and Nuvo Expanding Mousse - Worn Linen . Step 1 cut several berry branches from brown cardstock. Using Nuvo Crystal Drops - Berry Red add berries to branches - set aside to dry. When berries are dry turn over and add berries to back side - let dry. Step 2 cut a bunch of holly using Susan's Garden Club Holly & Berries die set. I cut mine from green cardstock but Susan cuts her's from white cardstock and colors with alcohol markers which I will try next time. Shade and shape leaves. Using Nuvo Crystal Glaze Paint all the leaves then set aside to dry. Th...

Our Thoughts

Image
Hello My Crafty Friends, Today I have a card for you I created using Susan's Garden Club Columbine and Brunnera along with Tonic Essentials Eastern Oyster Layering Basics Die Set. My card is a 6" X 6" card base. Cut Pearlescent Card - Ivory Sheen 5-3/4" X 5-3/4" Cut Luxury Embossed Card - Emerald Hessian 5-1/2" X 5-1/2" Using 3rd largest Eastern Oyster Die cut Ivory Sheen approximately 3/4" down from top. Using 2nd largest Eastern Oyster Die cut Emerald Hessian approximately 1/4" down from top. Using Nuvo Adhesive Tape to adhere Ivory Sheen to card front then Emerald Hessian on top of Ivory Sheen . Cut 5 Columbine flowers from white cardstock color as you wish. Cut leaves from green cardstock. Shape and build your flowers. Cut 5 sets of Brunnera florets from blue cardstock and leaves and stems from green cardstock. Shade and shape then build using Nuvo Deluxe Adhesive . Susan has tutorials on her Susan's Garden Club...

Thanks

Image
Welcome my crafty friends, Here today with a simple thank you card using Susan's Garden Club Beauty Berry Bush die set along with Tonic's Essentials Dot & Drop Die - Twisting Leaves . Here is how I created my card. Step 1 Cut 4 Beauty Berry Bush branches from green cardstock and 4 extra berry branches using Holly & Berry die set. Shade with distress ink then shape leaves with a ball tool giving dimension. Using Nuvo Crystal Drops - Plum Pudding add berries to branches set aside to dry then add berries to back side set aside to dry. Step 2 Cut white cardstock 5-1/2" square using Dot & Drop die cut into left side of cardstock. Adhere to 5-3/4" square of colored cardstock (dark purple / plum used here) adhere white cardstock to colored cardstock using Nuvo Adhesive Tape avoiding the cut outs. Adhere to 6" X 6" white card base. Step 3 Using Nuvo Crystal Drops - Plum Pudding add to each dot in design on card front set aside to dry....

Tiny Treasure

Image
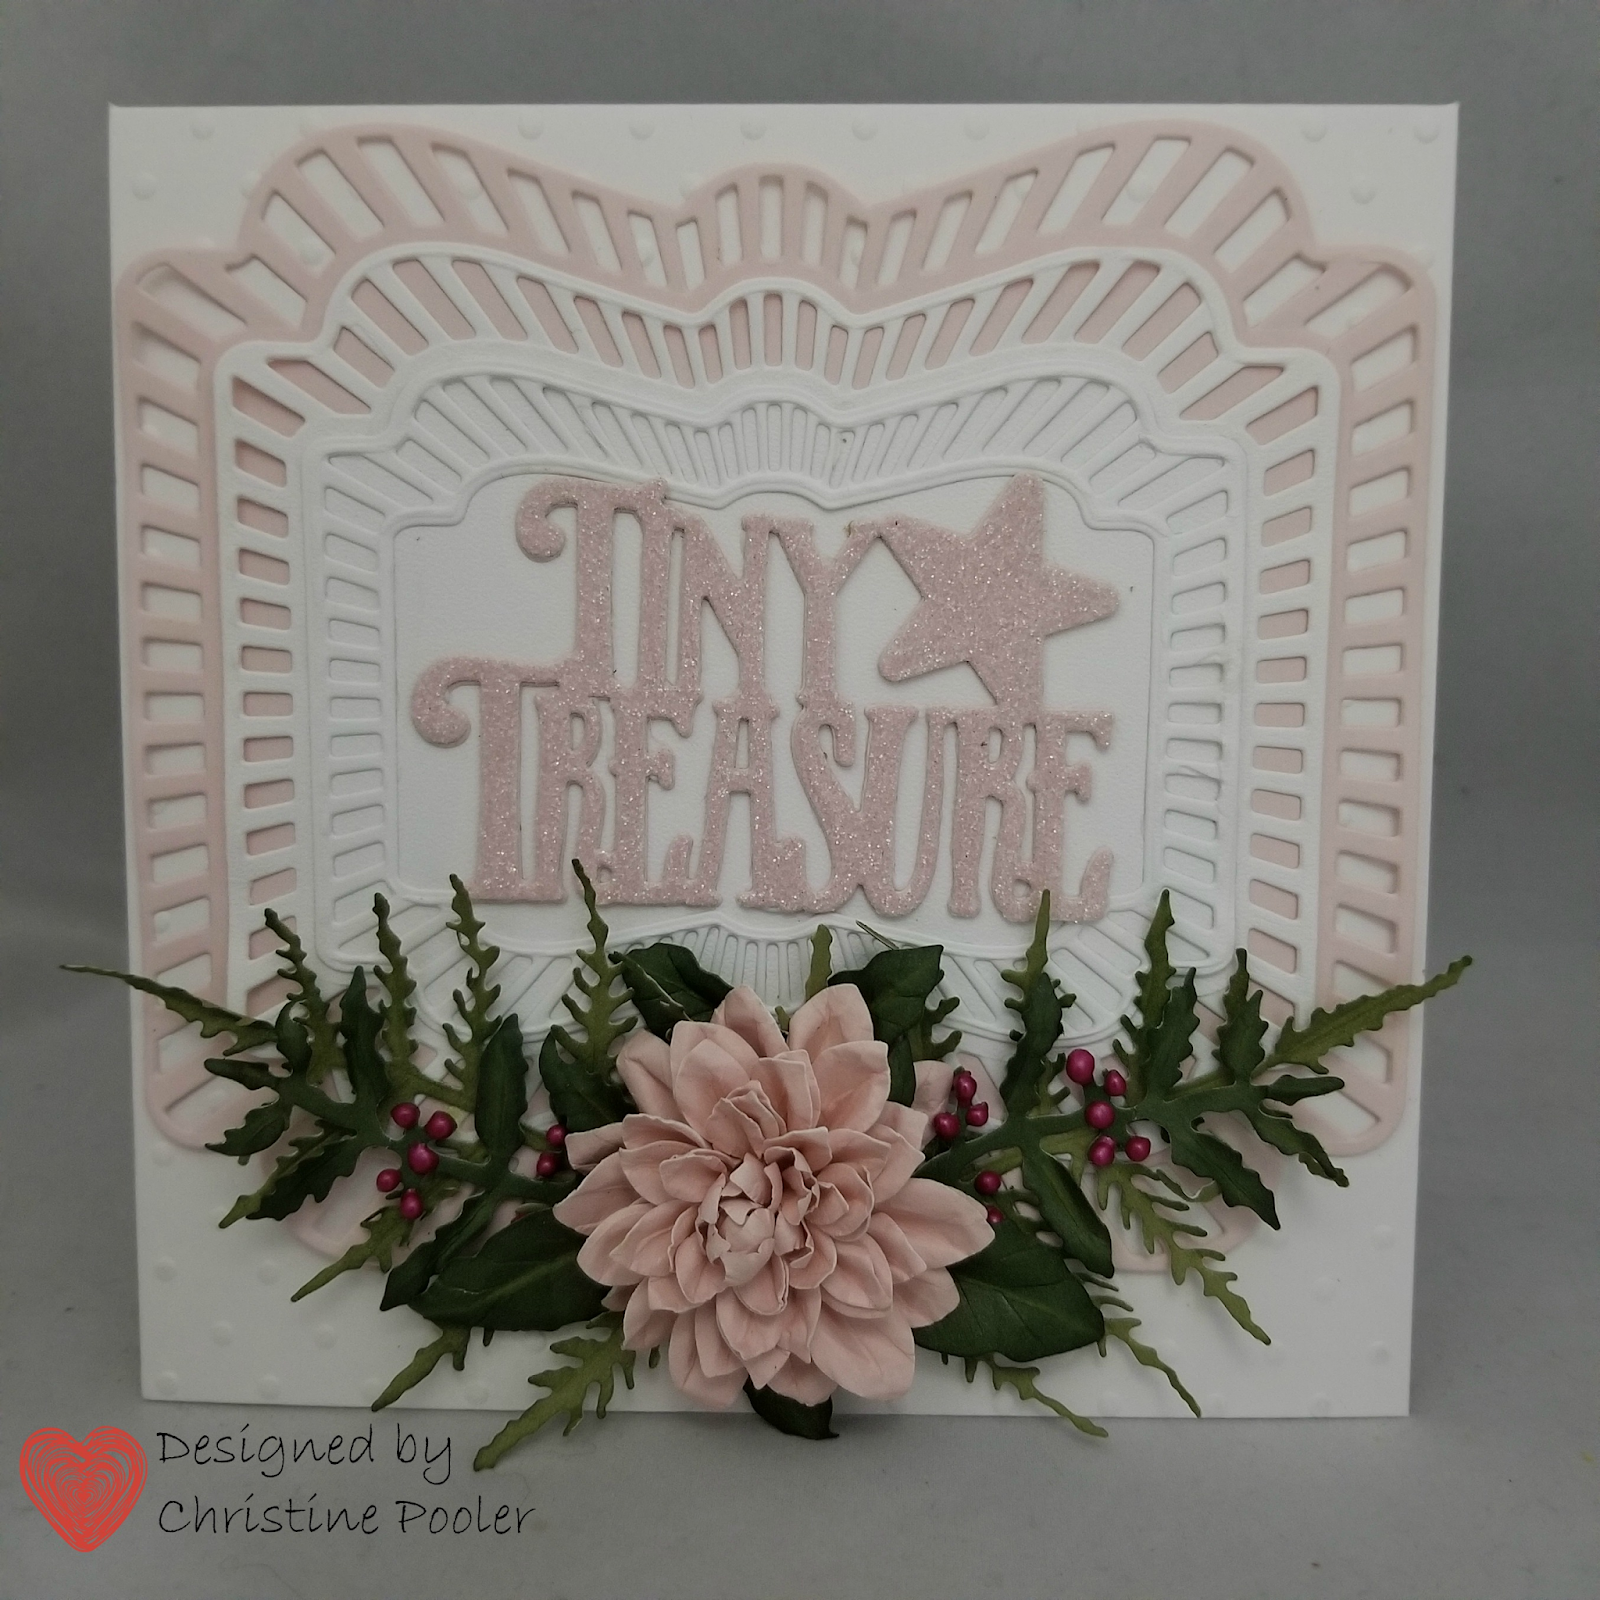
Hello My Crafty Friends, Weather here in Maine has turned cold and we have had a little snow - has gone now but I know that we could get the big one anytime so all gardening will be in paper for the next several months. Susan Tierney-Cockburn as many of you know has teamed up with Tonic Studios and has come out with her first release of flower dies under Tonic logo and they are beautiful as always. Tonic Studios has a lot of great supplies. Today my card is for a card I designed for a dear sweet friend that has just become a Mom for the first time - It's A Girl! Step 1   Cut 2 Beauty Berry Bush from green cardstock.  Shade with ink shape leaves.  Using Nuvo Crystal Drops - Plum Pudding add berries to branches set aside to dry.  When dry add berries to back side set aside to dry. Step 2  Cut 3 layers graduated in size ( Tonic's Memory Book Maker Layered Cascade Die Set used here) colors of your choice. Step 3   Using Tonic 6" X 6" White Card Base...

Echinacea Hugs

Image
Hello my crafty friends, Having such fun with Susan's new dies and Tonic products.  Today I have used Susan's Garden Club dies Echinacea, Japanese Painted Fern and Ladybug & Stems .  I played with the two colors that I have of Nuvo Mica Mist for a background. Card base is 6" X 6" using black cardstock cut 6" X 12" scored at 6" fold to form card. Added 5-3/4" square Pearlescent Cardstock - Ivory Sheen using Nuvo Tape Runner Using 5-1/2" square of black cardstock put into a cardboard box (to protect area from over spray) spray Pecan Peach Mica Mist let dry (it dries quickly) then spray Nuvo Wild Olive .  Once dry adhere to card front using Nuvo Tape Runner . Using Susan's Garden Club Echinacea die cut 5 sets from white cardstock. Using Copic markers color flowers I did 3 in orange and 2 in yellow. Shape and put together using Nuvo Deluxe Adhesive .  Cut florets from brown card stock using a toothpick cup each then adhere to c...

Basket of Holly and Berries

Image
Welcome my crafty friends, Here today with another card I have had down for a while so not a lot of detail. Susan dies are available on Create & Craft for 1st 30 days then will be available from Tonic Studios so be patient they are coming. Today I have used Susan's Garden Gathering Basket (love that the die set comes with both the metal tub and the basket) along with her Holly and Berries. Another 6" X 6" card base from colored cardstock.  White cardstock cut 5-1/2" square then embossed. Basket cut from white cardstock twice adhere on top of each other then colored with alcohol markers adhered to card front. Made a bunch of Holly leaves and Berry Branches.  When berries are involved that is always my first step so that they will have time to dry completely while I am doing everything else.  Berries were done using Autumn Red Nuvo Drops on both sides as Susan does.  Holly cut from green cardstock then shaped and glazed.  Added to basket using Nuvo Dexluxe Adh...

Tub of Spider Mums

Image
Welcome my crafty friends, Susan's new dies are so much fun.  Several of my cards have been done for a while hence I do not have all the particulars that I did as I was having so much fun playing with the dies I forgot to write info down.  Going forward I will try to do better but I get playing and get lost in what I am doing. Today my card uses Susan's Garden Spider Mum , Tub and Japanese Painted Fern .  Susan is now with Tonic Studios and boy do they have lots of wonderful product. The Tonic 6" X 6" white card base is used then colored cardstock cut 5-3/4" square added to card front.  From white 5-1/2" square cardstock a circle was cut in upper left of the piece.  You can use any background behind the circle but what I have used was an actual picture printed on white cardstock of my little building (which we call the basket shop as I use to make baskets there). My tub was cut twice adhered together then colored with Copic markers and metallic rubs th...

Columbine on Stained Glass

Image
Welcome my crafty friends, Another card using Susan's new release with Tonic .  Today I have featured the Columbine and one of my favorite perennials these are 2 of the colors I have. Tonic's 6" X6" white card base layered with green cardstock 5 - 3/4" square.  White cardstock cut 5-1/2" square the upper corner was cut using a die from my stash and bottom edge was cut with old Martha Stewart Punch.  Before adding to card front I cut a piece of white cardstock that was a little bit larger than the stained glass cut out.  Distress Oxide Sprays were used to color background then attached behind the cutout.  Add to card front. Using the new Susan's Garden Columbine die 5 flowers were cut from white cardstock then colored with Copic Markers.  They were shaped and put together using Nuvo Deluxe Adhesive . From green cardstock Japanese Painted Ferns were cut,color, shape adhere to right side of card front.  Add some berries (mine are old berry branches I ...

Diamond Survivor

Image
Hello my crafty friends, It has been a couple months since I last posted time has flown by. As a lot of you know Susan Tierney Cockburn has joined Tonic Studios and yesterday they had a launch of her 1st release of her beautiful flower dies  under the Tonic Studios Logo on Create & Craft .   I am so excited to once again be a member of Susan's Design Team I feel honored to represent her. My post today features a few of those dies. As you know October is Breast Cancer Awareness month and so my card was designed for a friend that is a breast cancer survivor. My card is 6" X 6" I used Tonic's card base. Embellishment Mousse (Spring Green) was used along with their Stencil Twisting Circles to create background in center. Pink cardstock was cut 5-3/4" square and Diamond was cut in center.  Next white cardstock was cut 5-1/2 square and Diamond was cut in center of it using next larger size.  These were layered over the background on card front. Japanese ...