Posts

Showing posts with the label Forget Me Nots

Spring Wildflowers of Maine

Image
  Welcome my crafty friends! Today my card I created has spring wildflowers we have here in Maine.  As I was looking around our new home this spring I saw the Dog Tooth Violets / Yellow Trout Lilies  growing on the edge of the  woods and thought that would be a great flower to create to go with the Forget Me Nots and the Lily of the Valley .  Susan doesn't have a die for it but decided to challenge myself to see if I could recreate them.   I picked some of them brought them in and started going through my dies and came up with some I thought would work. For the  Dog Tooth Violet / Yellow Trout Lily I used S2-376 Blackeye Susan from Birds & Bees Collection , S4-1235 Magnolia from Victorian Garden Collection and of course for the other two flowers I used Spellbinders Susan's Garden S4-1085  Lily of the Valley from Spring Flora Collection ,  S2-340 Forget Me Not from Garden Gate Collection .   I created a 5" X 7" card b...

Lily of the Valley & Forget Me Nots on a Tri-Fold Shutter Card

Image
Hello My Crafty Friends! My card today is a Tri-Fold Shutter Card that Susan Tierney-Cockburn did on her "Live" Susan's Garden Club 2 on March 25, 2026.  Video for creating this card can be found here .  I adorned my card with Spellbinders Susan's Garden Lily of the Valley S4-1085 from Spring Flora Collection and Forget-Me-Not S2-340 from Garden Gate Collection.   The embossing folder that I used was Spellbinders Susan's Garden Bee-Cause E3D-078 from Through the Arbor Collection.   The bottle the flowers are in was made from Shrink Plastic.  I cut large bottle ( 5-6" in size) on Cricut then traced the shape onto rough side of Shrink Plastic then I fussy cut it out.  I color the shape with alcohol markers on rough side.  I then used my heat gun to shrink.   I created my Lily of the Valley   (video here ) and the Forget-Me-Nots   (video here )by cutting them from Susan's Specialty Paper, colored with Olo Alcohol ...

Forget Me Nots & Pussy Willows

Image
Hello my crafty friends! Spring is on it's way so I have created a card with Forget Me Not and Pussy Willows .  I know Pussy Willows actually come and go before we even see the Forget Me Not  but thought they made a nice bouquet.  Spellbinders Susan's Garden Forget Me Not S2-340 from Garden Gate Collection was used and the Pussy Willows I actually designed myself.  You can find a little tutorial for them in a previous post.  The bottle was created from picture I took of a bottle I have and the background paper is one of my pictures printed on cardstock (this was a picture of wallpaper in a back bedroom at the Olson House where the picture "Christina's World" was painted by Andrew Wyeth in 1948.  He painted in a front bedroom of the Olson House) My card is a 5 X 7 card I created from 100# white cardstock.  My design paper was cut 4-3/4" X 6-3/4" and adhered to card front using Clear Double Sided Adhesive .  Woodgrain piece was cut 2" X 4-3'...

Mothers Day 3D Envelope Easel Card

Image
  Hello my crafty friends! Wow Spring has finally come to Central Maine so I have been very busy with outside work like splitting hostas then planting them, mulching, getting out planters & my 50+ galvanized watering cans etc.  Hope your Spring is going well! Today I have done some paper gardening I have done another 3D Envelope Easel Card as a friend requested I make one to give to her Mother-In-Law.  For this card I have used Spellbinders / Susan's Garden Camilla S4-1233 and Lemon Verbena S4-1278 Victorian Foliage from the Victorian Garden Collection, Forget Me Not S2-340 and Bee Blossom S3-445 from Garden Gate Collection, Berry Branch from S4-1079 Foliage & Ladybug Autumn Flora Collection, Winter Bough from S4-1114 Winter Bough & Evergreen Shrubs Holiday Collection anf Ladder Fern from Ferns & Ivy Spring flora Collection.   Paper is Carta Bella Gather at Home and the stamp set is CTMH C1605 Happy to be Friends. The envelope card base was one Susan...

Springtime 3D Envelope Easel Card

Image
Hello my crafty friends! Sorry I haven't posted in a while but needed a break to take care of other things.  Hopefully I can get back to my paper gardening on a regular basis.  I will paper garden when I can't garden outside! My card today is a 3D Envelope Easel Card which Susan Tierney-Cockburn did on her Susan's Garden Club Facebook "Live" this past Wednesday (April 29, 2023) .  I had a friend ask if I could do a card for 98 year old mother that is in long term care and wanted something bright and cheery.  Since it is spring I settled on flowers that are blooming or getting ready to bloom here in central Maine.  I have used the following Spellbinders/Susan's Garden dies S4-1085 Lily of the Valley from Spring flora, S2-340 Forget Me Not from Garden Gate, S5-470 Daffodil from Summer Flora, S3-445 Bee Blossom (Gaura) from Garden Gate and Victorian Foliage Ginkgo and Lemon Verbena from Victorian Garden.  The heart for the sentiment is from Spellbinders...

Thank You Thank You Thank You!

Image
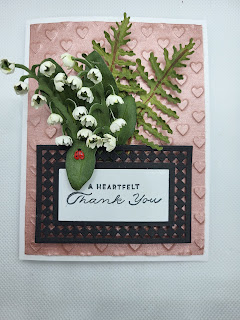
Hello My Crafty Friends, Today I have a few Thank You Cards that I created a couple months ago actually to thank some very special people for their kindness to me after I crashed and totaled my vehicle in May.  I was very lucky that I just had a lot of bruising.  They brought meals, flowers, gave rides and other kind deeds. Hope you enjoy looking at the cards as you can see I very much love Susan's Garden Lily of the Valley die set which many of my cards here have on them. Thanks for stopping by and until next time - Happy Crafting! Christine You only live once but if you live right once is enough! Unknown  

Basket of a Spring Bouquet

Image
  Hello my crafty friends! Spring is in the air finally.  Today I have a card I created of a basket full of spring flowers.  Forget Me Nots from Susan's latest release with Spellbinders Through the Garden Gate along with Susan's Garden Lilac, Lily of the Valley and I created on my own Grape Hyacinth using floral wire, tape and colored Styrofoam balls. Card is 5" X 7" base created from 110# cardstock.  Green Cardstock was cut 4-3/4" X 6-3/4" attached to card front using Clear Double Sided Adhesive .  Patterned paper (The Paper Studio - Blanc Boutique was used here) cut 4-1/2" X 6-1/2" adhered to card front using Clear Double Sided Adhesive . From Susan's Garden S6-181 Garden Basket & Glads basket was cut twice from brown cardstock cut handle off then attaching together using Bearly Art Glue embossed using basket weave embossing folder by Darice then shaded with brown ink. Basket was attached to card front using Bearly Art Glue applie...

Bucket full of Forget Me Nots & Lily of the Valley

Image
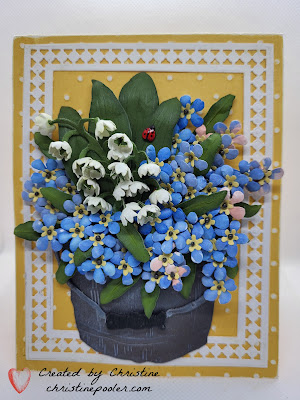
Hello my crafty friends, Great news I am so excited to tell you Susan has a brand new release available at Scrapbook.com and a couple other places it is called Through the Garden Gate and contains Forget Me Nots (which I have used here), Hollyhock, Gardenia, Floribunda Rose, Beeblossom and Sentiment Stamp Set.   Another great release for sure. My card today is a 4-1/2" X 5-3/4" tent fold.  Yellow cardstock with a white core was cut 4-1/2" by 11-1/2" scored at 5-3/4".  Swiss Dot embossing folder was used to emboss front of card only then sanded to reveal white core of paper. Using the 3 largest dies from Spellbinders Candlewick Rectangles and white cardstock with Clear Double Sided Adhesive on back a frame was cut.  Frame was adhered to front of card. S6-182 Wooden Bucket was cut twice once from white cardstock and once from gray cardstock both with Clear Double Sided Adhesive on the back.   Attach white one on top of gray one.  A couple of gray ...

Hello Friend w/Forget Me Nots & Ferns

Image
Welcome my crafty friends, Today I have for you a card I created for a friend from my childhood she use to come to stay with her Gram who lived up the street from us.  We haven't seen each other in at least 55- 60 years and recently met up - what fun it was to reminisce and catch up on each others lives. I used a retired Susan's Garden Forget Me Not die set and Spellbinders Susan's Garden Club Ferns die set.  The Ferns and Forget Me Nots were chosen for this card from one of our childhood memories in which we got into trouble for picking these items. Card is 4-1/2"X 5-3/4" White Cardstock was cut 4-1/4 X 5-1/2 Spellbinders Diamond Lace Frame Cut and Emboss was used on this piece.  Colored cardstock was cut just slightly smaller than embossed piece.  Attach to back of embossed piece using Bearly Art Glue.  Attach to card front using clear double sided adhesive. The mason jar was created from Shrinky Dink Film colored with Copic markers and shrunk in oven.  B...

So Sorry Bouquet

Image
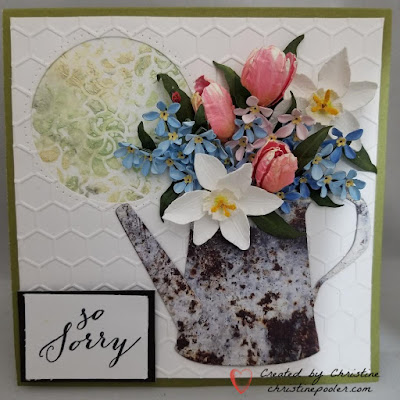
Hello My Crafty Friends, Sadly this week Corona 19 Virus took the life of a family member of one of our members of our online  paper garden club so members are making sympathy cards and posting them in our group - this is mine. For my card I have used Susan's Garden Notes Watering Can, Tulips, Forget Me Notes and Daffodil / Narcissus die sets as well as Frame It - Circles. Card base is 6" X 6" created from green cardstock.  White cardstock was cut 5-3/4" square then circle was cut in upper left corner.  Piece was then embossed.  Background piece was attached behind circle opening then piece was attached to card front using Clear Double Sided Adhesive. Watering Can was cut twice once from black cardstock with Clear Double Sided Adhesive on back and once from decorative paper also with Clear Double Sided Adhesive on back then adhered together.  Dimensional dots added to back in center then add to card front. Flowers were all cut from White Soft Finish Cardstock 90...

Forget Me Not

Image
Hello My Crafty Friends, Warm weather has finally arrived here in Maine and it sure feels great.  I have been getting all my pots, window boxes, bicycle, wagon washtubs etc filled with lots of annuals now to keep everything watered. The Forget Me Nots are in bloom and how pretty they are here in Maine the spring flowers are really beautiful.  Today my card has the Forget Me Nots along with the Pom Pom Dahlia and the Ostrich Fern. The Ostrich Fern,which are now starting to unfurl, are a spring time treat around here. When it first comes up and is still tightly coiled they are "Fiddleheads". Many people start harvesting them and selling them roadside people steam them are said to be quite tasty and loved by many (not me). I don't mind harvesting if the black flies are not too bad. My card is a 5" X 7" A dot embossing folder was on front. Beccka Feeken's die set Nobel Chatelaine Etched was used to cut decorative pieces a solid green for backing and white overla...

Forget Me Not

Image
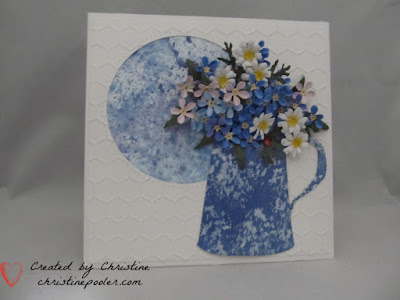
Hello My Crafty Friends, Trying to stay busy during the stay at home and no power days I have created another card.  I leave the sentiment off now until I am ready to use the card something that took me a long time to do.  I tend to make cards that can be used for most any occasion so by leaving the sentiment off until I need a card it is very easy to add sentiment. Here is how it was created. Step 1  Created 6" X 6" card base from white cardstock. Step 2  Cut piece of white cardstock 5-3/4" square  cut circle in upper left corner using Garden Notes Frame It Stitched Circle Dies then embossed using 8-1/2 x 11 honeycomb embossing folder. Step 3  Background piece was something I took from my stash I had created using Distress Oxide either inks or sprays.  Used a larger circle to cut to fit behind opening.  Used Clear Double Sided Adhesive to attach background circle to back of opening then attaching square to card front. Step 4  Susan's Garden ...

Cup of Forget Me Nots

Image
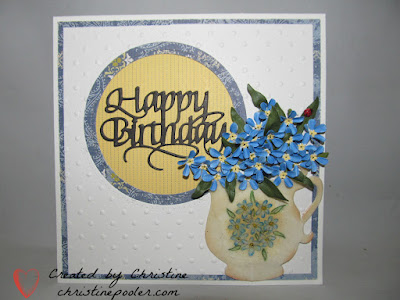
Hello My Crafty Friends, My card today features some of Susan Tierney-Cockburn' s older dies Garden Notes Tea Cup, Forget Me Nots and Stitched Frames Circle. This card was based on this inspiration picture Tea Cup was cut from White Soft Finish Cardstock with Clear Double Sided Tape on back. Adhere 1 on top of the other. Using Distress Oxide Inks I created a small background in center of cup. A few Forget Me Not flowers and leaves were penciled on over background. Water Color Pencils were used to color image. Several coats of embossing powder were added to cup. Garden Notes Forget Me Nots were created from White Soft Finish Cardstock colored with Copics B23 marker. The tiny center flowers were cut from yellow cardstock and leaves from green cardstock which was shaded and shaped. Several sprigs were created. Card base is a 6" X 6" created from White Soft Finish Cardstock. Yellow paper was cut 5-1/2" square adhered to card front. Blue printed paper was cut 5...

Nasturtiums & Forget Me Nots

Image
Nasturtiums & Forget Me Nots Hello My Crafty Friend, Today my card is a happier card it is a birthday card for one of my nieces. Tried a little foiling for the background of this card. Susan's older Garden Notes dies were used for the Nasturtiums, Forget Me Nots and Trevi Urn. Step 1 Form 4-1/4" X 5-1/2" card base - I used a yellow cardstock. Step 2 Cut black cardstock 4" X 5-1/4" using a stencil (Stampers Anonymous Mini Bricks used here), Transfer Gel and Foil ( Opal used here) make your background. Adhere to center of card front using Nuvo Adhesive Tape Runner . Step 3 Make a frame from white cardstock using 2 nested rectangles adhere over foiled piece using Nuvo Adhesive Tape Runner . Step 4 Die cut 2 Susan's Trevi Urns from white cardstock with adhesive on the back. Adhere one on top of the other. Color and shade. Shape a bit with your fingers add a couple pop dots on center lower back then adhere to lower center of card. Step 5 Using ...

Forget-Me-Not

Image
Welcome My Crafty Friends! My post today is a card using a couple of  Susan's new releases Garden Notes - Forget- Me- Not and Garden Notes Frame It - Ovals .  By now you can see I love the new Frame It Ovals there is also Circles, Squares and Rectangles in this new release as well. Here is how it was created. Step 1   Create 6" X 6" card base from white cardstock. Step 2   Cut patterned paper 6" X 6" adhere to  card front using Clear Double Sided Adhesive . Step 3   Cut white Soft Finish Cardstock 6" X 6" using next to largest Susan's Garden Notes - Frame It - Ovals . Place die 3/4" in from left side and equally between top and bottom - you want to leave room on right to stamp sentiment die cut oval.  Stamp sentiment  (you want to stamp before adhere just to make sure you get good image)using black ink.  (Stamp I used here was one of Susan's original Seeds of Thought Red Rubber Stamps at Elizabeth Craft Designs but I could not find it...