Posts

Showing posts with the label Susan's Garden Notes

Hydrangeas in Tub

Image
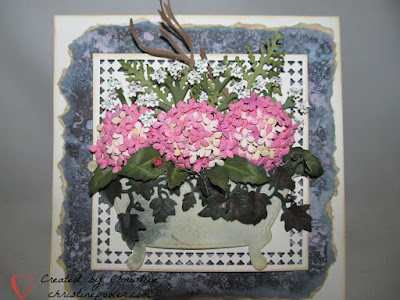
Welcome my crafty friends, Hope that you are all doing well.  Summer seems to be zipping right along I do wish it would slow down a little as here in Maine Winter sure is long. Last week on Facebook I re-posted a picture of several bathtubs with different plantings so I decided to create a card with a bathtub of flowers.  I had some flowers left from the last card along with one of the backgrounds I recently created so that is what I have used. Card base is 6" X 6" edged with Distress Oxide Antique Linen ink. Background piece was created using 6" square black cardstock then used a few Distress Oxide Sprays.  Edges were torn then inked with Distress Oxide Antique Linen.  Adhered to card front using Clear Double Sided Adhesive. 5" square white Soft Finish Cardstock  was cut using 2 largest dies from Spellbinders Candlewick Squares taped together.  Square was attached to card front using dimensional tape. Bathtub  (an old Karen Burniston die set from when...

Forget Me Not

Image
Hello My Crafty Friends, Warm weather has finally arrived here in Maine and it sure feels great.  I have been getting all my pots, window boxes, bicycle, wagon washtubs etc filled with lots of annuals now to keep everything watered. The Forget Me Nots are in bloom and how pretty they are here in Maine the spring flowers are really beautiful.  Today my card has the Forget Me Nots along with the Pom Pom Dahlia and the Ostrich Fern. The Ostrich Fern,which are now starting to unfurl, are a spring time treat around here. When it first comes up and is still tightly coiled they are "Fiddleheads". Many people start harvesting them and selling them roadside people steam them are said to be quite tasty and loved by many (not me). I don't mind harvesting if the black flies are not too bad. My card is a 5" X 7" A dot embossing folder was on front. Beccka Feeken's die set Nobel Chatelaine Etched was used to cut decorative pieces a solid green for backing and white overla...

Oh Happy Daisy

Image
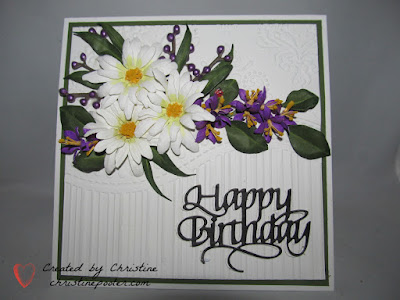
Hello My Crafty Friends, Hope you all had a great Mother's Day at least the best you could under the circumstances.  I am sure it was much different than any other you have celebrated.  Our lives are turned upside down right now I do hope that creating beautiful things has gotten you through so far. Early fall we will have a brand new release of Susan's wonderful dies with Spellbinders I can't wait but until then we are using her old releases which I know are hard to find but there are some out there. Here is a card I created for you using Susan's Garden Notes Shasta Daisy and Jasmine along with Suzanne Cannon - A Way With Words - Happy Birthday Small.  The embossing folder is one that came in a magazine several years ago but not sure and there is no brand name on it. Created a 6" X 6" card base from white Soft Finish Cardstock.  Cut green cardstock 5-3/4" square adhered to card front using Clear Double Sided Adhesive.  White Soft Finish Cardstock was cut...

Hyacinth Hello

Image
  Hello My Crafty Friends, Well it is Spring although today we got snow again so paper gardening was in order. My card today has a very popular spring flower - Susan's Garden Notes - Hyacinth. My card is a 6" X 6" tent fold card.  Card base was created using white Soft Finish Cardstock cut 6" X 12" scored at 6" and folded on score line. Used Susan's Garden Notes Frame It - Rectangles die set to cut opening in card front.  I am lucky I have some 8-1/2" X 11" embossing folders  used one to emboss front of card base. Distress Oxide Sprays in various colors were used on photo paper to create background piece then adhered to back of card front using Clear Double Sided Adhesive behind opening. 5 Hyacinths were created in different colors cut from white Soft Finish Cardstock then colored with Copic Markers.  Stems and leaves were cut from green cardstock - I cut the leaf  off  stem and used separately. From gray cardstock with Clear Double Sided Adhe...

Pitcher of Tulips

Image
    Hello my crafty friends, Today I have a card I created using Susan's Garden Notes Tulip 2 and her Pottery Pitcher.  Once again I had seen a picture on Facebook and wanted to try to recreate in paper - something I really love to do.  Here is my inspiration picture. This is a 6" X 6" card base.  Tonic Specialty paper (white) was cut 6" square then oval was cut out of center.  Adhere to card front using Clear Double Sided Adhesive.  A second piece of Specialty paper (black) was used and same oval was cut from it.    Adhere the black oval inside oval opening on card front. The Pitcher was cut twice from black cardstock with Clear Double Sided Adhesive on back.  Adhere one on top of other.  The finish was actually a trial and error and it was not exactly how I wanted it but felt it was good enough to use.  I was out of texture paste so I used snow accent which is   grainier than texture paste.  I then used Seth Ap...

Blue Poppy & Daisies

Image
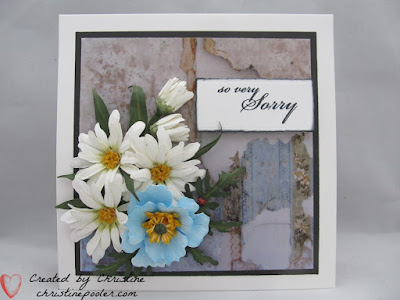
Hello My Crafty Friends, So happy that Susan is going with Spellbinders and that I am on her Design Team.  I will be linking more products once her new release comes out this September.  When you click on the linked items it takes you to the site where you can purchase you do not pay anymore this way but I do earn a small commision when you do this. Today I have another sympathy card I created once again using Susan's Garden Notes Poppy 2 and Shasta Daisy .  The background paper is a photo I had taken of some old peeling wallpaper then printed on white Soft Finish Cardstock. Here is how I created it. Step 1   6" x 6" card base.  Cut colored cardstock (black used here) 5-1/4" square adhere to card front using Clear Double Sided Adhesive .  Cut background paper 5" square add to card front using Clear Double Sided Adhesive . Step 2  Create 3 daisies, 2 buds and 1 poppy  Susan's video for these which can be found here Step 3   Build flowers on...

Poppy Hugs

Image
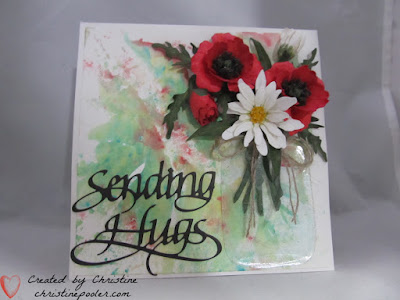
Hello My Crafty Friends, I do hope you are all staying safe and healthy.  We are staying home as much as possible only going to grocery store as needed.   Boy I cannot wait until hubby can take this job back I am not a fan of grocery shopping.  We are both in that bracket of being higher risk due to health and age he is 78 and I am 70.   Let 's hope that this is all over soon so we can get back to some kind of normalcy. During my time at home I have been making some flowers and creating cards.  Today's card is featuring the poppy and daisy.  Perfect timing on my part as I see Susan is doing a live today and one of the things she is demonstrating is the poppy so I will link that as soon as it is available.  Susan's link came be found here for both the poppy and daisy. Sadly I have several sympathy cards to make none being due to the virus thank goodness. Exciting news from Susan Tierney-Cockburn she is going with Spellbinders and will have a ...

Forget Me Not

Image
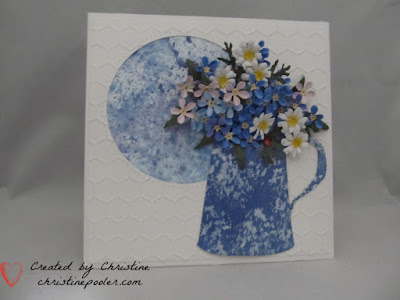
Hello My Crafty Friends, Trying to stay busy during the stay at home and no power days I have created another card.  I leave the sentiment off now until I am ready to use the card something that took me a long time to do.  I tend to make cards that can be used for most any occasion so by leaving the sentiment off until I need a card it is very easy to add sentiment. Here is how it was created. Step 1  Created 6" X 6" card base from white cardstock. Step 2  Cut piece of white cardstock 5-3/4" square  cut circle in upper left corner using Garden Notes Frame It Stitched Circle Dies then embossed using 8-1/2 x 11 honeycomb embossing folder. Step 3  Background piece was something I took from my stash I had created using Distress Oxide either inks or sprays.  Used a larger circle to cut to fit behind opening.  Used Clear Double Sided Adhesive to attach background circle to back of opening then attaching square to card front. Step 4  Susan's Garden ...

Pussy Willows & Daffodils

Image
Hello My Crafty Friends, Hope that everyone is staying safe and healthy. Today I have a sympathy card I made for a friend - always hard card to make. My card was created using Susan's Garden Notes Canning Jar & Lid, Garden Notes Daffodil / Narcissus along with Garden Notes Stitched Frame It- Squares. Here is how it was created. Step 1  Card base is 6" X 6" white cardstock Step 2  Create a background piece.  Mine was created using  several colors of Nuvo Embellishment Mousse. Step 3  Using a coordinating cardstock to cut a frame using Susan's Garden Notes Stitched Frame It Squares (use two largest together to cut frame).  Using Clear Double Sided Adhesive attach frame over background piece.  Adhere the piece to card front using Clear Double Sided Adhesive. Step 4  Cut Susan's Garden Note Canning Jar twice once from white cardstock that has Clear Double Sided Adhesive on back and one from Clear Sticker Paper.  Adhere the clear jar on top of...

Life is Tough

Image
Hello My Crafty Friends, First and foremost I want to take the time to say THANK YOU to everyone on the front lines doctors, nurses, janitors, food service, grocery store employees as well as the truck drivers etc.  I hope that those that can stay home do stay home so we can get this horrible virus under control. Today I have a card that I created for a dear friend that has just been diagnosed with breast cancer which is very scary in itself but during this pandemic it is scary ten fold. A couple of weeks ago Susan's "Live" on Susan's Garden Club Facebook page had the Bells of Ireland which was intriguing as it was combining different pieces from several die sets.  Here is how I created it. Step 1 form 6" X 6" card base ( tent fold or side fold whichever your preference). Step 2  Cut white Soft Finish Cardstock 5-3/4" square.  Using shape of your choice cut shape upper left side of cardstock. ( Tonic Mixed Edge Diamond Layering Basics Die Set used here)...

Cup of Forget Me Nots

Image
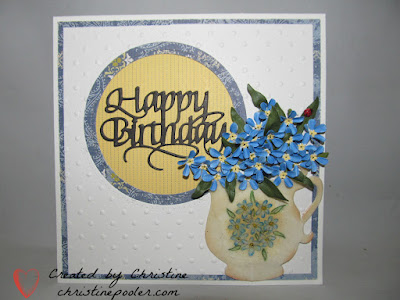
Hello My Crafty Friends, My card today features some of Susan Tierney-Cockburn' s older dies Garden Notes Tea Cup, Forget Me Nots and Stitched Frames Circle. This card was based on this inspiration picture Tea Cup was cut from White Soft Finish Cardstock with Clear Double Sided Tape on back. Adhere 1 on top of the other. Using Distress Oxide Inks I created a small background in center of cup. A few Forget Me Not flowers and leaves were penciled on over background. Water Color Pencils were used to color image. Several coats of embossing powder were added to cup. Garden Notes Forget Me Nots were created from White Soft Finish Cardstock colored with Copics B23 marker. The tiny center flowers were cut from yellow cardstock and leaves from green cardstock which was shaded and shaped. Several sprigs were created. Card base is a 6" X 6" created from White Soft Finish Cardstock. Yellow paper was cut 5-1/2" square adhered to card front. Blue printed paper was cut 5...

Courage for Dawnie

Image
  Welcome to my blog my crafty friends! My card today is for a friend that is going through breast cancer treatment.  My inspiration was a picture that I had seen on Facebook that just "spoke to me".  This is the picture Here is how I created it. Step 1   Create a 6" X 6" card base from 110# white Soft Finish Cardstock. Step 2   Cut black glitter paper 5-3/4" X 5-3/4" Adhere to card front using Clear Double Sided Adhesive. Step 3   I downloaded picture to my computer then printed copy on 90# white Soft Finish Cardstock then cut to 5-1/2" square.  Adhere to card front using Clear Double Sided Adhesive. Step 4 Die cut Garden Notes Dahlia from white 90# Soft Finish Cardstock.  Color with alcohol markers (I matched up the color as flower in picture was just a bit larger than the one I created so I needed it to blend).  Shape your pieces then build flower on card front using Kids Choice Glue.  Create a couple of leaves add to flower using Ki...

More Sympathy Cards

Image
  Welcome my crafty friends, It has been a long time since I posted and I am sorry but it just has been a crazy summer.  I do hope that you are all enjoying your summer. I have worked on cards but just haven't taken the time to post and unfortunately these cards do not have tutorials but I have links to the products I used so you just have to click on the picture and it will take you to the site.  If you have questions on how I did something please message me and I will gladly respond. For those of you who don't know Susan's Garden has gone to Tonic Studios and she will have a new release of dies in September and she has asked me to be on her Design Team which I feel honored as well as excited and of course I accepted so be sure to keep checking back she has some great dies coming. Thank you for stopping by today and until next time Happy Crafting! Christine

Sympathy Cards

Image
Welcome my crafty friends! Just a quick post today.  Today I have 3 sympathy cards I created using some of Susan's Garden Notes dies.  I have not done tutorials but they are very simple to do.  Because sympathy cards are usually not a planned thing it helps if you have a few flowers ahead so a card can be created in a timely manner.  These cards all have the Garden Notes Love In A Mist which I love to make. Card 1 has a background paper that I made myself by printing off a picture I had taken of old wallpaper. Card 2   the colorful oval was done with coffee filter and powder water colors. Card 3   the colorful image was done using Distress Oxide Inks. Thanks for stopping by and until next time - Happy Crafting! Christine   Elizabeth Craft Designs Supplies

Purple Callas

Image
Hello My Crafty Friends, The weather here in Maine has started to cooperate a little so much of my spare time has been spent outside digging and planting until I can't stand the black flies driving me back inside. Today I have a card that I created which was inspired by a bouquet I saw at the florist shop.  The lady ahead of me was picking up flowers for a wedding and when I saw the gorgeous Calla Lilies I knew I had to try and recreate them in paper. Here is how the card was created. Step 1   Using white Soft Finish Cardstock form 6" X 6" card base. Step 2   From same cardstock cut piece 5-3/4" square.  Using embossing folder of your choice (I am sorry I do not know the name of mine I have had it for sometime) emboss cardstock.  Using Clear Double Sided Adhesive adhere square to card front. Step 3   From green cardstock cut several ferns using Garden Notes Ladder Fern .  Add using using distress ink.  To add dimension use tweezers from Garden N...

70th Birthday Calla Lilies

Image
Welcome My Crafty Friends! Wow it has been more than a month since my last post as we have had a lot going on. As we all know life does get in the way of our crafting sometimes but I am back now and it seems great.  I have really missed making cards but there was just no time. My card today uses Susan's Garden Notes Calla Lily, Cosmos, Ladder Fern and Stitched Rectangle Frame It along with Elizabeth Craft Designs Stitched Fishtail Banners .  My little background feature was done using Brusho Watercolor Powders and coffee filter. Here is how I created my card. Step 1   Create background piece using glossy photo paper, coffee filter and watercolor powders Susan has a video on her Facebook page Susan's Garden Club found here Step 2   Form 6" X 6" card base from 110# white Soft Finish Cardstock . Step 3   Cut white Soft Finish Cardstock 5-3/4" square.   Using Garden Notes Frame It/Stitched Rectangles cut rectangle on right side using size of your ch...

Birthday Orchid

Image
Hello my crafty friends - Welcome! From my paper garden today is a card I created using Susan's Garden Notes Phalaenopsis (Moth Orchid) and Trevi Urn. Here is how card was created. Step 1   Form card base 5" X 6" From white Soft Finish Cardstock (The embossing folder actually determined card size as I started as a 6" X 6" then had to trim down)  Emboss card front. Step 2   Using white Soft Finish Cardstock which has Clear Double Sided Adhesive on back cut 2 Garden Notes Trevi Urns .  Adhere 1 on top of other.  Color urn using alcohol markers in your choice of colors. Remove protective paper add pop dot center lower back of urn then adhere to card front keeping close to bottom to allow room for flowers at top. Step 3   From white Soft Finish Cardstock cut several Garden Notes Phalaenopsis (Moth Orchids) color with alcohol markers in color of your choice then shape using Susan's 4 pc. All Metal Tool Set, molding pads and Leaf Pad see Susan's video...

With Sympathy Flame Lily

Image
  Hello my crafty friends - Welcome! Still snow here in Maine so no outdoor gardening so I get to do more paper gardening which I love.  As I get older I am finding I enjoy the paper gardening more than outdoor as it is easier on my back. My card today uses Susan's new Garden Notes Flame Lily again along with great fillers Garden Notes Feverfew 1 and Maidenhair Fern . Here is how card was created. Step 1   From white  110# Soft Finish Cardstock form 6" x 6" card base. Step 2   Cut patterned paper 5-3/4" square ( ModaScrap Wood Effects used here).  Adhere to card front using Clear Double Sided Adhesive . Step 3   Cut frame from green cardstock using 2 largest dies from Elizabeth Craft Designs Stitched Hexagons .  Line dies up making sure they are even all around use removable tape to hold together while die cutting.  Using Clear Double Sided Adhesive adhere frame to card front 1/4" down from top. Step 4  From white Soft Finish Card...

Flame Lily Birthday

Image
Hello my crafty friends welcome to my blog! Today I have a card I created using Susan's new Garden Notes Flame Lily die set.  This is my first attempt will continue to work on them. Here is how card was created. Step 1   Create card base from 110# white Soft Finish Cardstock .  Mine is 5-7/8" square instead of 6" square as I wanted my embossing folder to work. Step 2   Cut white Soft Finish Cardstock 5-7/8" square then emboss.  I trimmed away the top part of embossed piece along curved line.  Although I don't know the name of my embossing folder or the maker I did look on line and found that Joyful Home and Tatter Lace do make some similar ones.  Using Clear Double Sided Adhesive to attach embossed piece to card front. Step 3   From 110# white Soft Finish Cardstock cut 3 Garden Notes Flame Lily cut leaves and stamen from green cardstock.  Using alcohol markers in colors of your choice color petals  (I have 2 red and yellow and 1 pu...

Plant Smiles

Image
Hello my crafty friends welcome to my blog. Here in Maine we are still waiting for spring weather to take away the snow so until then the only gardening I can do is paper gardening.  Today from my paper garden I have a card I created for you using more of Susan's Garden Notes new releases.  This card has the new Garden Notes Heart Grapevine Wreath, Ranunculus and Calla Lily . Here is how card was created. Step 1   From green cardstock cut 2 Garden Notes Leafy Berry Branch .  Using Distress Ink shade.  Using Molding Pad and Medium Ball Tool from All Metal 4 pc. Tool Kit shape leaves.  Using Nuvo Crystal Drops add berries set aside to dry.  When dry add berries to back side let dry. Step 2   Form 6"x6" card base using large embossing folder emboss card front only. Step 3   Cut 2-4 Garden Notes Heart Grapevine Wreaths from brown cardstock.  (I used 4 on this card)  Stack wreaths using Kids Choice Glue sparingly so as not to glue tw...