Posts

Showing posts with the label Susan's Garden Club

Japonica Twisted Easel

Image
 Hello My Crafty Friends, Today I am happy to be posting another card using Susan's  new Garden Notes Spellbinders Spring Release.  My card today features Kerria Japonica and is a twisted easel card.  Susan did the twisted easel card on her "Live" last week on her Facebook page Susan's Garden Club. Base is created from 6 X 12 cardstock scored at 6" folded and burnished.  Front of card was scored from lower left corner to upper right corner.  folded and burnished. Distress Ink - Vintage Photo was used to age all edges. Cut 2 pc patterned paper 5-3/4" squares edges were aged with distress ink then adhere to front and inside using clear double sided adhesive. Large Die of the Month October #DOMXL OCT17 was die cut and adhered using clear double sided adhesive just to bottom half of front.  Inner piece of same set was cut twice from green cardstock glued together using   Bearly Art Precision Craft Glue avoiding the tendrils and ferns....
Home of the Free

Image
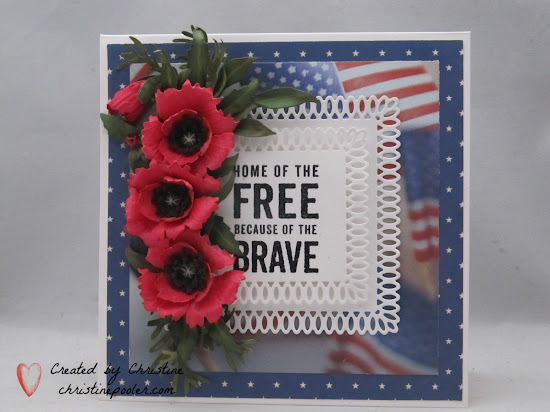
Welcome my crafty friends, My card today has red poppies in honor of all the Veterans as we celebrate Veterans Day. I am so thankful for all those that have served our country some who have given their life for our Freedom. My card is a 6" X 6" tent fold card. Pattern paper from my stash was used to decorate front of card. The blue paper with white stars was cut 5-3/4" square then adhered to card front using Clear Double Sided Adhesive. Flag pattern paper was cut 5" square then adhered as before. Susan's Garden Club Oriental Poppy die set was cut from white cardstock ( 3 full flowers and a bud) , colored with Copic marker then shaped. You can find tutorial video here for creating these poppies. Using the Foliage and Ladybug die set from Susan's Autumn Flora collection 3 Eucalyptus were cut from green cardstock, shaded and shaped. Several sprigs of Rosemary were created as well as 1 ladybug. Tutorial video can be found here . 2nd & 3rd Spellbinders P...

Daisy Mums in a Shadowbox

Image
Welcome My Crafty Friends, Today I have my 5th and final Breast Cancer Survivor card for this year. I am happy and sad all at the same time. I am so thankful they have survived and I have them people to send cards to but sad that they have had to endure this terrible disease. PLEASE PLEASE PLEASE if you have not had your mammogram yet make that appointment today it can save your life! Today my card is another shadowbox card which is so easy and fun to create. Susan's Autumn Flora Button & Daisy Mum set was used along with Foliage & Ladybug set. To create the shadowbox I went by Susan's Facebook Live on Susan's Garden Club which you can find here . Once my Shadowbox was completed I added to card front using Clear Double Sided Adhesive. Next I created 3 stems of Nandina and 2 stems of Eucalyptus which I arranged inside shadowbox attaching with Kids Choice Glue. I cut 3 Daisy Mums from white cardstock and colored centers with Copic RV52. Leaves were cut from ...

Pink & White Poppies

Image
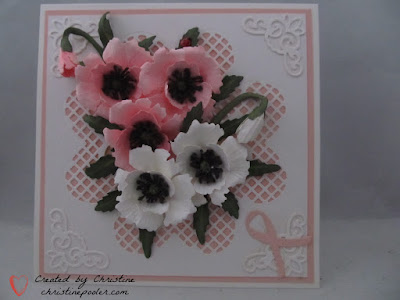
Welcome My Crafty Friends, My card today is another card for a Breast Cancer Survivor. PLEASE if you haven't gotten your mammogram yet this year get it as it could save your life! Today I have used Susan's Autumn Flora - Oriental Poppy along with Spellbinders Lace Hearts . My card base is a 6" X 6" created from white cardstock. Pink cardstock was cut 5-3/4" X 5-3/4" adhered to card front using Clear Double Sided Adhesive. White cardstock was cut 5-1/2" X 5-1/2 Spellbinders Lace Hearts was used to cut design in cardstock. I found the center of the piece then placed die on cardstock and cut. Once I got design cut I erased pencil marks. See pictures below. Once design was cut Clear Double Sided Adhesive was used to adhere to card front. From white cardstock 5 poppies and 2 buds were cut using Autumn Flora Oriental Poppy . 3 Poppies were colored with Copic Markers 2 were left white. they were shaped and assembled. Susan has a YouTube video for this...

Survivor #3

Image
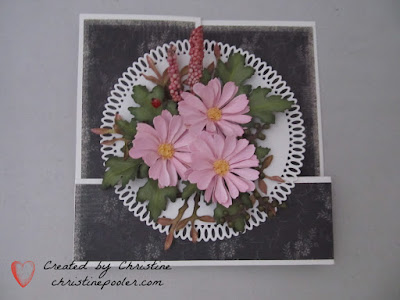
Welcome My Crafty Friends so glad you stopped by today! Today I have my 3rd Survivor card in honor of a breast cancer survivor. My card is a Z Fold card with Daisy Mums, Nandina an a bit of Lady's Thumb. Card base is a 6" Z Fold Card created using white cardstock cut 6" X 12" scored at 3" and 6" mountain fold at 3" score valley fold at 6". Cut band at 2" X 12" scored same as card base. Pattern paper was cut as follows 2 pieces 2-3/4" X 5-3/4" square, 1 piece cut 5-3/4" and 1 piece 1-3/4" X 12. Pattern pieces were adhered to their respective card base areas using clear double sided adhesive. Note: when adhering pattern paper to band keep in mind that the folds will be opposite from card ie 6" mountain fold and 3" valley fold. 6" section of band was adhered to left side of 3" section of card base using red line tape. then 3" section of band was adhered to right side of card the same w...

Poppies for a Survivor

Image
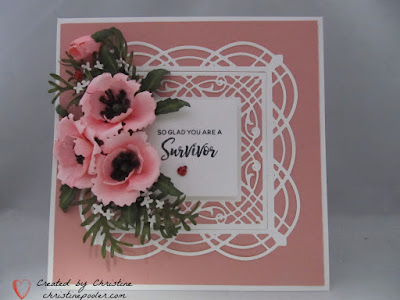
Welcome My Crafty Friends, My card today is my second survivor card for Breast Cancer Awareness 2020 . For this card I used Susan's Oriental Poppy and Foliage & Ladybug sets from her Autumn Flora Collection along with Becca Feeken's Adoria Square Shadowbox Frame set. Card is 6" X 6" - cut white heavy cardstock 12" X 6" score at 6" fold on score line. Cut pink cardstock 5-3/4" square attach to card front using Clear Double Sided Adhesive. From white cardstock I cut 3 largest dies from Adoria Square Shadowbox Frame set. Art Glitter Glue Dries Clear as well as Clear Double Sided Adhesive were used to adhere to front of card. From same set the smallest plain square die was used to cut pieces of white cardstock for the sentiment. Using black ink sentiment was stamped on square it was then adhered to card front center using dimensional dots. Three Oriental Poppies plus 1 bud were cut from white cardstock and colored using RV21 Copic marker...

Survivor Button Mum

Image
Welcome My Crafty Friends, October is Breast Cancer Awareness Month so PLEASE if you haven't had your mammogram yet schedule it today! A few years ago I started making a couple of cards each October to send to different survivors (not necessarily breast cancer but cancer survivors) so today I have my first one for October 2020. For my card I used Susan's Garden Club Autumn Flora Button & Daisy Mum set and Foliage & Ladybug set along with one of Becca Feeken's die sets . My sentiment is from a stamp set I bought several years ago it is a fundraiser for the Breast Cancer Research Foundation and is still available from ellenhutson.com . Card base is 6"x6" created from white cardstock. Pink cardstock was cut 5-3/4" square then embossed. Clear Double Sided Adhesive was used to adhere to card front. Berry Branch from Foliage & Ladybug set was cut twice from green cardstock then adhered together with Kids Choice Glue . Shaded with a little ...

Daisy Mum in a Bottle

Image
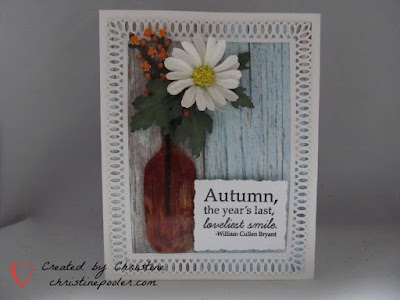
Hello My Crafty Friends, Today I have a card that was inspired by a picture I saw on Facebook. This is the inspiration pictur Inspiration Picture My card is 5" X 6-1/4" created from white cardstock cut 10" X 6-1/4" scored at 5". The bittersweet is something I like to make ahead so the Nuvo Drops have time to dry well. Susan has how to video on the berries here The brown bottle was created using Shrink Film. First I cut bottle on Cricut at 8" then traced onto Shrink Film then colored using a brown Copic Marker. Using Heat Tool I shrunk it down it measures 3-1/2". Pattern paper was cut 4-1/2" X 5-7/8" then adhered to card front with clear Double Sided Adhesive. The largest die in the Petite Picot Rectangle set was used along with the next to the largest A2 Matting Basic A die set to create a frame. I set the matting die inside the Picot Rectangle taped together and cut from white cardstock. Frame was adhered over pattern paper using Art ...

Framed Coreopsis

Image
Welcome my crafty friends, Today I have another card for you featuring Spellbinders Susan's Autumn Flora Coreopsis along with foliage ( foliage with a twist it is similar to a weed that grows here in Maine). My card mats are from Spellbinders APG series Petite Picot Squares . Here is how I created my 6" x 6" card. Step 1 I created the beaded part using Styrofoam beads separated into 4 containers. Added a few drops of Distress Oxide Reinker in each (Spun Sugar, Picked Raspberry, Aged Mahogany and Peeled Paint) mix each one to distribute color. Next I mixed beads together in another cup. I will tell you maybe alcohol reinker may way work better as the Distress Oxide do not dry well and tend to muddy the colors. Step 2 Using 4" piece of flower wire wrapped with floral tape I rolled top 1" - 1-1/4" of wire in Kids Choice Glue then dipped into colored beads and manipulate with your fingers to get shape. Heat gun was used very carefully to dry a little ...

Encircled Coreopsis

Image
Hello My Crafty Friends, Today I have a card I created using some of Susan's Autumn Flora Collection . I am using Coreopsis and Foliage along with Spellbinders APG Picot Petite Circles . Card Base 6" X 6" tent fold Colored cardstock cut 5-3/4" X 5-3/4" adhered to card front with Clear Double Sided Adhesive . Using Nestabilites Standard Circles I cut 2 frames by taping 2 circle dies togetherand adhered together using Art Glitter Glue Dries Clear . From white cardstock I created another frame using Picot Petite die and Standard Circles which I adhered to the basic frames using glue. Added narrow dimensional strips to back then adhered to card front. From green cardstock I cut 2 berry branches using the die from the Foliage die set (I like to cut twice to give stability) adhere one on top of other. Use green ink to shade. Added white berries using white Nuvo Drops. I like to do my berry branches in the very beginning so they have time to dry while I a...

Button Mums and Autumn Hydrangea

Image
Welcome my crafty friends hope you are all staying safe. Today I have a card I designed using Susan's brand new release Autumn Flora Button Mums and Autumn Hydrangea through Spellbinders. Another fantastic release from Susan I just love working with her dies. My card today is a 6" X 6" tent fold created from white cardstock. Patterned paper from my stash was used for background cut 5-3/4" X 5-3/4" adhered to card front using clear double sided adhesive. Amazing Paper Grace Picot Petite Circle was cut from white cardstock using largest die in set. Circled was adhered to card front using clear double sided adhesive. Two Button Mums were cut from white cardstock then colored with Copic Markers then shaped and assembled. I used Susan's old tools to shape my flowers but she has great new set coming out it should be available by January 2021. Off white cardstock and Distress Oxide Inks were used to color florets. I picked 3 or 4 colors that I wanted in my hyd...

Gaillardia in a Shadowbox

Image
Welcome my crafty friends glad you stopped by. today on my blog I have for you another shadowbox card I have created with Gaillardia from Susan's new release Autumn Flora. The shadowbox card is so much fun - addictive. Susan did the Shadowbox card a few weeks ago on her Wednesday Live which you can find here . Once you have formed your Shadowbox card Cut 3 Gaillardias using the new Autumn Flora die set. Chose colors that coordinate with you card color and shape your flowers. Susan has YouTube videos for her newly released flowers. Flowers are arranged and adhered in shadow box using Beacons Kids Choice. leaves were shaded, shaped and adhered, On off white cardstock using black ink stamp sentiment ( I have used Susan's Autumn Quotes Clear Stamp Set) . Die cut using rectangle that fits around sentiment. Ink edges and adhere to lower right corner using double sided adhesive. Add a leaf and ladybug using Kids Choice Glue. Hope this has inspired you to create - until next t...

Fallen Leaves

Image
Welcome my crafty friends, So glad you stopped by. Today I have a card I created using Susan Garden Club - Autumn Flora - Woodland Garden Leaves. Card base 6" X 6" from white cardstock Colored mat is 5-3/4" X 5-3/4" adhered to card front using clear double sided adhesive Die cut is Spellbinders Nestabilities Candlewick Square Etched Dies cut from white cardstock. Susan's Autumn Quotes Stamp Set was used for sentiment stamped in black ink before attaching to card. Dimensional tape was used to adhere die cut to card front. Using brown cardstock cut 2 berry branches adhere 1 on top of other using liquid glue. Shade using brown ink. Die cut little flowers from yellow cardstock shaped using medium ball tool. Kids Choice Glue was used to adhere little flowers to berry branch. Using Ripened Pumpkin Nuvo Drops make bittersweet berries on branches set aside to dry. Happy Fall Die D Lite set was used for the basket. Basket was cut twice once from dark brown c...

Autumn Leaves and Coreopsis

Image
Hello my crafty friends, Autumn is getting closer here in Maine some leaves have started to turn and due to dry weather some are already falling. Susan Tierney-Cockburn's new release with Spellbinders Autumn Flora is available to purchase today. Autumn Flora has 8 die sets and 1 stamp set. Today's card features the Coreopsis and Woodland Garden Leaves Etched. Card base is 4-1/4 X 5-1/2 white cardstock Patterned paper 4 X 5-1/4 adhered to card front with clear double sided adhesive. Using Hexi Strip I die cut 1 from white cardstock. Art Glitter Glue Dries Clear with fine tip was used to adhere to left side of card front. Sentiment is from new stamp set Autumn Quotes stamped on white cardstock using black ink then die cut using Deckled Edges Rectangle. Use dimensional tape to adhere to card front. 4 Maples leaves were cut from white cardstock using die from Woodland Garden Leaves Etched then colored with alcohol markers in autumn colors. Using Coreopsis die set I cut 3 from w...

Hydrangea Shutter Peekaboo Card

Image
Hello my crafty friends, My card today is a Shutter Peekaboo card that I created.  Last week on Susan's Garden Club Live Susan did one of these cards so I had to try one.   I made one years ago way before I was making Susan's flowers boy they really dress this card up.  I had an inspiration picture in mind when I did the flowers so decided to combine the card with my inspiration. Finished card is 5" X 7" Susan did a video for creating card which can be found here The patterned paper I used was an old Close to My Heart - Laughing Lola. For the flowers I used white Soft Finish Cardstock colored it with Distress Oxide Inks then cut flowers.  Flowers were shaped using Susan's tools and molding mats then built. Sentiment in the peekaboo is a Close to My Heart stamp. Suzanne Cannon's A Way With Words Happy Birthday was used cut from cardstock with Clear Double Sided Adhesive on back - once from black and once from white.  I adhered the black first then white offs...

Friendship Hydrangeas

Image
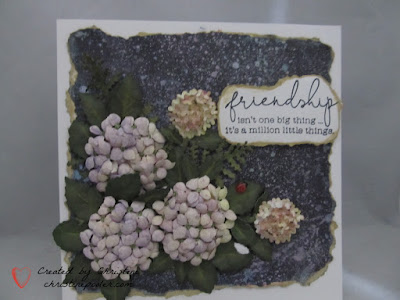
Hello My Crafty Friends! Hope that everyone is enjoying their summer at least to the best of your abilities during these trying times. Today I have a card I for a friend that has just had hip surgery so will be going to visit her soon.  I (re)created using a technique called Black Magic for background and an arrangement that Susan did a couple of weeks ago. Card is a 6" X 6" created from white Soft Finish Cardstock 110# 6" X 6" Black cardstock using Distress Oxide Inks (I used 3 color Sprays) create background.  Tear around the edges and use Distress Ink to ink edges (Antique Linen used here).  Video for Black Magic backgrounds can be found at end of video found here  Hydrangeas were something I had already created so not sure what colors or techniques that I used.  A couple of ferns were laid down first (but they really don't show so not needed) added my hydrangeas and leaves using Kids Choice Glue.  Placed them so that there would be room for sentiment. S...

Arrow Fold Condolence Card

Image
Welcome my crafty friends, Today I have for you an arrow fold card that I created.  The card design is not mine I found it on YouTube it is by Sam Calcott of the UK. Card base was created following Sam's YouTube video found here I kept the flowers simple because of pattern paper being busy. Using Susan's Garden Notes Love In The Mist I created 3 white flowers and several leaves attaching with Kids Choice Glue. Sentiment was stamped with black ink on white cardstock then matted in green cardstock.  Another sentiment was stamped inside of card. Hope you enjoyed this card and has inspired you to create your own Arrow Fold card they are really quick and fun to do. Remember Susan has a brand new release coming out 1st of September with Spellbinders so stay tuned you will love them! Thank you for stopping by today and until next time - Happy Crafting! Christine You only live once if you live right once is enough! Unknown      

Daisy & Chicory Envelope Card

Image
Hello my crafty friends welcome to my blog. Today I have an envelope card that I created and decorated with Susan's Garden Note Daisies, Ferns, Chicory (created from Susan's Garden Notes Aster die set) and Jasmine. Susan did the envelope card a couple of weeks ago on her Garden Club Live found here .  Another good video for making the envelope card is by Sam Calcott it can be found on YouTube here . From white soft finish cardstock created envelope and card base.  Used pattern paper to decorate envelope.  (An old Close to My Heart Paper used here)  I stamped  quote in black then used some little blotchy stamps with black ink to decorate inside of my card.  Close to My Heart stamp set - A Million Little Things was used. Created 4 Susan's Garden Notes Daisies, 6 asters (cut from blue cardstock), some Jasmine and ferns - Ladder and Maidenhair.  A few small branches were tucked in arrangement. To create the chicory I cut off the very ends of the asters the...

Deepest Condolences

Image
Welcome My Crafty Friends, Well here in Maine we have had our 3 days of summer - yesterday morning there was a frost here and a few tomato plants were lost hopefully that is it for frosty weather until fall. My daffodils have come and gone but these paper ones will last forever.  My card today was created using Susan's Garden Notes Daffodil and Narcissus, Galvanized Bucket and Ladder Fern along with Spellbinders Shapeabilities - Contemporary Diamonds. Card is 6 X 6 from white cardstock.  Black cardstock cut 5-3/4" square attached to card front using clear double sided adhesive.  White cardstock cut 5-1/2" square embossed then adhered to card front. Spellbinders Contemporary Diamonds cut twice from cardstock with clear double sided adhesive once from black once from green.  Black outline piece adhered to left side of card front then green cut out pieces set into openings. Susan's Garden Notes Galvanized Bucket cut twice once from black cardstock with clear double side...

So Sorry Bouquet

Image
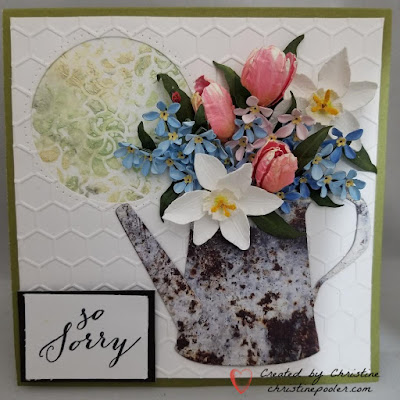
Hello My Crafty Friends, Sadly this week Corona 19 Virus took the life of a family member of one of our members of our online  paper garden club so members are making sympathy cards and posting them in our group - this is mine. For my card I have used Susan's Garden Notes Watering Can, Tulips, Forget Me Notes and Daffodil / Narcissus die sets as well as Frame It - Circles. Card base is 6" X 6" created from green cardstock.  White cardstock was cut 5-3/4" square then circle was cut in upper left corner.  Piece was then embossed.  Background piece was attached behind circle opening then piece was attached to card front using Clear Double Sided Adhesive. Watering Can was cut twice once from black cardstock with Clear Double Sided Adhesive on back and once from decorative paper also with Clear Double Sided Adhesive on back then adhered together.  Dimensional dots added to back in center then add to card front. Flowers were all cut from White Soft Finish Cardstock 90...