Posts

Showing posts from August, 2021

Red & White Slimline Amaryllis

Image
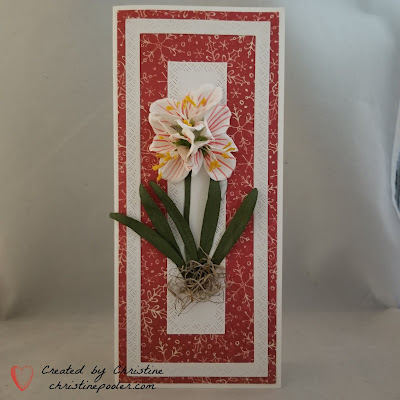
Hello my crafty friends, Today I have another slimline Christmas card for you.  I am loving the slimline cards just something different.  Today I have adorned my card with the Amaryllis from the Holiday Flora Collection by Susan Tierney-Cockburn. Card base is 4" X 9" white 100# cardstock. Pattern paper was cut 3-3/4" X 8-3/4" attached to card front using Clear Double Sided Adhesive.   Frame was cut from white cardstock using some Long Cross Hatch Rectangle Dies outer measurement is 3-3/8" X 8-3/8" inside opening is 2-3/4" X 7-3/4" adhered to card using Clear Double Sided Adhesive.  Inner rectangle measures 1-3/8" X 6-3/8" cut from white cardstock and adhered to card front. Amaryllis flowers were cut from Susan's Specialty Paper and colored with Copic Marker then shaped using Susan's Deluxe Tool Kit .  Leaves were cut from green cardstock shaded and shaped.  Susan has a YouTube video on how to create the Amaryllis which c

Merry Christmas Double Candle Oval

Image
  Hello my crafty friends, Today I have another Christmas card that I created using Susan's new Holiday Flora Release .  I have used the Poinsettia, Pinecones & Evergreen Boughs, Winter Boughs & Evergreen Shrubs and candles from Garden Lantern. Card is 6" X 6"off white cardstock tent fold. Patterned paper was cut 5-3/4" square.  Using Oval die cut opening in patterned paper evenly lining up die so top and 2 sides have equal distance which leaves about 2 inches on bottom.  Laid on card front and lightly traces around oval removed pattern piece and used distress inks to create a back ground.  (Old Paper and Scattered Straw were used here)  Erased oval pencil mark then using Clear Double Sided Adhesive attached patterned paper to card front lining up oval opening over inked area. 4 candles were cut from red cardstock and stacked together attaching with Barely Art Glue creating 2 candles.  1 candle was cut shorter and a small slit was made in top of each.  Both

Plaid & Pine Cones Slimline Card

Image
  Hello my crafty friends! Today I have a slimline card adorned with Pinecones, Pine Boughs, Mistletoe and Winter Foliage from Susan's Garden Club new Holiday Release you are going to want it all in this release.   Card base is white cardstock cut 8-1/2" X 9" scored at 4-1/4" folded on score line.  Pattern paper was cut 8-3/4" X 4"  then chose a rectangle die that would fit my sentiment and cut a rectangle into left side of my pattern paper.  Pattern paper was place on card front using a pencil lightly traced around opening then removed pattern paper.  Black ink was used to stamp sentiment within the rectangle then pattern paper was  adhered to card front using Clear Double Sided Adhesive .  From white cardstock a slimline frame was cut then adhered to card front using Clear Double Sided Adhesive . To adorn this card I used Pinecone & Evergreen Bough, Mistletoe, Evergreen Shrub and Holiday Quotes from Susan's new Holiday Release .  Susan has YouT

Double Z Fold Lantern Card

Image
  Hello My Crafty Friends - Welcome to my blog. Today my card is a Double Z Fold c ard with Susan's new Garden Lantern w/ Candle, Poinsettia, Winterberry and Pine Boughs .  Another fun fold card to create and show off Susan's new Christmas Release . Base is white cardstock 6" X 12" scored at 3" and 6" mountain fold at 3" score line valley fold at 6" score line.  Brown ink used on all edges.  2 pc of red cardstock cut 2-3/4" by 5-3/4" and 1 pc 5-3/4" square adhere red cardstock pcs to card base using Clear Double Sided Adhesive . 3 pc of pattern paper 2 cut 2-1/2" X 5-1/2" and 1 pc cut 5-1/2" square adhere to red cardstock using Clear Double Sided Adhesive.   White cardstock cut 4-1/2" X 9" scored at 3" and 6"  edged with brown ink 3" score mountain fold valley fold at 6" score.  3 pc of red cardstock cut 2-3/4" X 4-1/4" adhered to white cardstock using Clear Double Sided Adhe

Gladiolus Slimline Card

Image
Hello my crafty friends, Today I have a card for you using the fabulous new Gladiolus die from Susan Tierney-Cockburn / Spellbinders  new Summer release coming soon to the US. My inspiration picture for one of the colors I chose for my paper gladiolus.  When I saw this picture I just had to try to recreate. My card is a slimline card created from white cardstock 8-1/2" by 9" scored in middle at 4-1/4".  Frames were cut from black gloss cardstock with Clear Double Sided Adhesive on back using Honey Bee Stamps Slimline Thin Frames.  I chose every other one starting with largest adhered to card front. Vase was an old die cut I had laying around so traced onto gold cardstock and embossed and fussy cut.  Attached to card front using Kids Choice Glue just around very edge leaving top open putting couple pop dots in bottom center on back. Gladiolus were created using Susan's' Garden Club Specialty Paper.   Petals for dark glad was colored with Copic R89 Dark Red and 100

Woodland Wreath with Poinsettia & Pine Cone

Image
Hello my crafty friends, welcome to my blog! Today my Christmas card was created using the brand new  Susan's Garden Club Woodland Wreath along with Poinsettia, Pinecone, Pine Boughs, Winter Boughs & Evergreen Shrubs and added a bit of snow. For my card today I used a tan colored cardstock to create a 6" X 6" card base (mine is tent fold so whatever your preference is).  Dark brown cardstock was used for mat layer cut 5-3/4" square adhered to card front using Clear Double sided Adhesive .  Patterned paper was cut 5-1/2" square and adhered in same manner.  Patterned paper was purchased years ago in a little scrapbook store that is not longer there.  I loved this paper and have saved all this time and decided it was time to use it. For the wreath two different brown cardstocks were used to cut 4 Woodland Wreaths used some brown ink to add shade.  I did some pinching up on each of them to give them dimension.  Using Kids Choice Glue to attach to card front I

Amaryllis Tag Card

Image
Hello my crafty friends welcome to my blog. Today I have created a Tag Card with one of Susan's Garden Club / Spellbinders Christmas Releases - the Amaryllis. Card base was created cutting white cardstock 7-1/2" by 9" score at 4-1/2" fold on score line to for 4-1/2" X 7-1/2" card.  Using next to largest die from Nested Tag die set lay die onto card base placing folded side of card base just inside cut line of die so it doesn't cut on that side removable tape used to hold in place then put through die machine.  Pattern paper was cut from 3rd largest tag die then adhered to card front using Clear Double Sided Adhesive .  White cardstock was then cut using 4th largest tag die adhered in same manner ( If I did this card again I would emboss this piece in a snowflake embossing folder). From Susan's Garden Club Specialty Paper using Amaryllis die cut petals for 3 flowers then leaves from green cardstock.  Flowers were colored with Copic markers then sh