Posts

Showing posts with the label Susan's Garden

Lily of the Valley Card & Box

Image
    Well I know it has been a while since I have posted but I have been busy.  I changed my blog from WordPress to Blogger got everything copied over but unfortunately my followers did not transfer.  If you had been a follower you will have to start following me again on my new blog.  If you weren't a follower before please start following me and you will be notified of any new posts. Today I am excited to be posting a card using a die set from Susan's Garden new Spring Flora Collection from Spellbinders.  I am excited to be using the Lily of the Valley such a sweet flower in smell and looks.  I have made a slim line card with a matching box.   My paper is something I printed off.  I bought the download from Etsy and I think it is just perfect for my card today. Card base is 9-1/2 by 4 Cut cardstock 9-1/2 by 10-1/2 score at 2-1/2 and 6-1/2.  Fold and burnish on score lines mountain fold then valley fold. Cut  3 pieces pattern p...
Happy Bouquet

Image
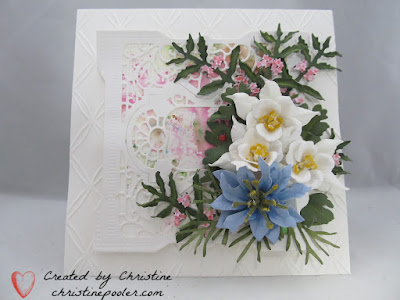
Hello My Crafty Friends, Today I have a card I created using  Susan's Garden Club Columbine, Beauty Berry Bush and Garden Notes Love In A Mist along with Spellbinders Vintage Treasures by Becca Feeken. Card base is 6" X 6" created from 110# Cardstock then embossed front.  The embossing folder was found on Amazon. Background piece was from my stash and die cut with the frame lit in Vintage Treasures die set. From white cardstock Vintage Treasures was die cut background was attached to back of main die cut using Kids Choice Glue.  Dimensional tape was used to adhere to card front. Several Beauty Berry Bush were cut from green cardstock flowers cut from pink cardstock then shaped and assembled. three Columbine were cut from white cardstock shaped and assembled as well as one Love In A Mist cut from blue cardstock leaves from green cardstock. Once flowers were where I wanted them they were attached using Kids Choice Glue. Hope my card has inspired you to create.  Thanks ...

Pitcher of Tulips

Image
    Hello my crafty friends, Today I have a card I created using Susan's Garden Notes Tulip 2 and her Pottery Pitcher.  Once again I had seen a picture on Facebook and wanted to try to recreate in paper - something I really love to do.  Here is my inspiration picture. This is a 6" X 6" card base.  Tonic Specialty paper (white) was cut 6" square then oval was cut out of center.  Adhere to card front using Clear Double Sided Adhesive.  A second piece of Specialty paper (black) was used and same oval was cut from it.    Adhere the black oval inside oval opening on card front. The Pitcher was cut twice from black cardstock with Clear Double Sided Adhesive on back.  Adhere one on top of other.  The finish was actually a trial and error and it was not exactly how I wanted it but felt it was good enough to use.  I was out of texture paste so I used snow accent which is   grainier than texture paste.  I then used Seth Ap...

Bottles of Blossoms

Image
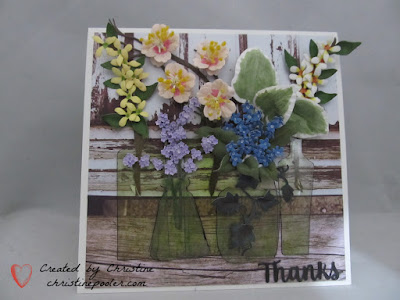
Hello My Crafty Friends, My card today was inspired by a picture that I had seen on Facebook.  This is my version using many of Susan's Garden Notes dies - Forsythia, Cherry Blossom, Lavender, Ivy Vine, Hosta Leaves etc. Card is 6" X 6" with 5-3/4" square patterned paper adhered to front using Clear Double Sided Adhesive. Bottles were first cut on the Cricut.  I couldn't get it to cut the sticker paperas I so I had to cut them from cardstock then trace onto clear sticker paper and hand cut.  Several different size bottles  were cut cutting several of each size.  A green alcohol marker was used to color one bottle then second bottle was adhered over top of colored one.  Used black alcohol marker to edge each bottle. Created Forsythia in white and yellow, Lavender, Cherry Blossoms, Brunnera, Hosta Leaves and Ivy Vine which was added to back of various bottles. Adhered bottles to card front adding Kids Choice Glue to adhere to flower branches and  leaves....

Forget Me Not

Image
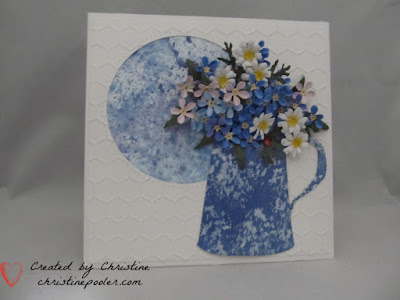
Hello My Crafty Friends, Trying to stay busy during the stay at home and no power days I have created another card.  I leave the sentiment off now until I am ready to use the card something that took me a long time to do.  I tend to make cards that can be used for most any occasion so by leaving the sentiment off until I need a card it is very easy to add sentiment. Here is how it was created. Step 1  Created 6" X 6" card base from white cardstock. Step 2  Cut piece of white cardstock 5-3/4" square  cut circle in upper left corner using Garden Notes Frame It Stitched Circle Dies then embossed using 8-1/2 x 11 honeycomb embossing folder. Step 3  Background piece was something I took from my stash I had created using Distress Oxide either inks or sprays.  Used a larger circle to cut to fit behind opening.  Used Clear Double Sided Adhesive to attach background circle to back of opening then attaching square to card front. Step 4  Susan's Garden ...

Bucket of Tulips

Image
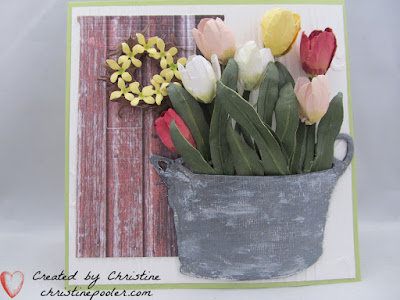
Hello My Crafty Friends, Hope everyone is doing OK during these trying times.  If the Corona Virus isn't bad enough we in Maine got slammed with a spring "Nor'Easter which left thousands of people without power over several days our home being one of them after 44 hrs without power it has been restored to us others are still waiting unfortunately - 2020 has been very interesting so far lets hope that it improves very soon.  Cudos to all the linemen and women out there helping to get power restored they work long hours in some difficult conditions. Today I have a card for you which I created using Susan's Garden Galvanized Bucket and her Garden Notes Tulip 2 dies along with a couple others. Here is how I created it. Step 1  Created 6" X 6" card base from green cardstock Step 2  Cut white cardstock 5-3/4" square then embossed using an 8-1/2 X 11 woodgrain embossing folder.  Adhere to card front using Clear Double Sided Adhesive. Step 3  Cut Garden Notes ...

Pussy Willows & Daffodils

Image
Hello My Crafty Friends, Hope that everyone is staying safe and healthy. Today I have a sympathy card I made for a friend - always hard card to make. My card was created using Susan's Garden Notes Canning Jar & Lid, Garden Notes Daffodil / Narcissus along with Garden Notes Stitched Frame It- Squares. Here is how it was created. Step 1  Card base is 6" X 6" white cardstock Step 2  Create a background piece.  Mine was created using  several colors of Nuvo Embellishment Mousse. Step 3  Using a coordinating cardstock to cut a frame using Susan's Garden Notes Stitched Frame It Squares (use two largest together to cut frame).  Using Clear Double Sided Adhesive attach frame over background piece.  Adhere the piece to card front using Clear Double Sided Adhesive. Step 4  Cut Susan's Garden Note Canning Jar twice once from white cardstock that has Clear Double Sided Adhesive on back and one from Clear Sticker Paper.  Adhere the clear jar on top of...

Life is Tough

Image
Hello My Crafty Friends, First and foremost I want to take the time to say THANK YOU to everyone on the front lines doctors, nurses, janitors, food service, grocery store employees as well as the truck drivers etc.  I hope that those that can stay home do stay home so we can get this horrible virus under control. Today I have a card that I created for a dear friend that has just been diagnosed with breast cancer which is very scary in itself but during this pandemic it is scary ten fold. A couple of weeks ago Susan's "Live" on Susan's Garden Club Facebook page had the Bells of Ireland which was intriguing as it was combining different pieces from several die sets.  Here is how I created it. Step 1 form 6" X 6" card base ( tent fold or side fold whichever your preference). Step 2  Cut white Soft Finish Cardstock 5-3/4" square.  Using shape of your choice cut shape upper left side of cardstock. ( Tonic Mixed Edge Diamond Layering Basics Die Set used here)...

Wreath With Hellebores

Image
Hello my crafty friends, Just wanted to share with you a card I did for a Christmas card challenge I am a member of on Facebook - Cardmaking Tips.  On Sunday we are given a theme then we create a Christmas card using that theme and post picture of it in album for that week.  At the end of the year you have your Christmas cards made and ready to send out. On my card I have used Susan's Garden Notes Evergreen Wreath #1221, Garden Notes Berry Spray 1481 with Nuvo Drops - Autumn Red for berries and Susan's Garden Club Helleoborus Wood grain embossing folder and Close To My Heart stamp set - Christmas Joy #C1520. Thanks for stopping by and until next time - Happy Crafting! Christine You only live once but if you live right once is enough! Unknown

Potted Orchid

Image
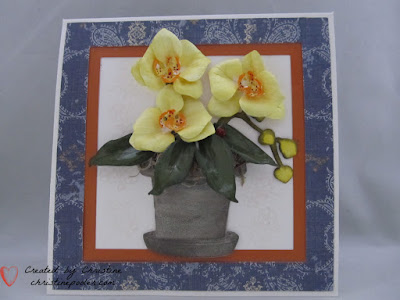
  Hello my crafty friends! Today I have a card I created per request of a friend.  Susan's Garden Notes Phalaenopsis (Moth Orchid) is the flower in Susan's Garden Notes Potted was used along with Fitted Stitch Frame It Square dies. Susan has a video on her Facebook page Susan's Garden Club for the orchid. You can find video here  6" X 6"  bright white card blank. Patterned paper cut to 5-3/4" X 5-3/4" die cut square in center. Burnt Orange cardstock cut 5-1/2" X 5-1/2" next smaller square cut in center.  Using clear double sided adhesive attach patterned paper over orange cardstock lining up so it is even all around then adhere to card front using clear double sided adhesive. Cut 2 pots from cardstock with clear double sided adhesive on back - 1 from gray card stock 1 from white soft finish cardstock. Adhere white on top of gray one.  Using alcohol markers color and shade.  Remove protective backing add couple of dimension squares lower center ...

Cheery Pom Pom Dahlias

Image
  Welcome my crafty friends, Today I have a colorful card that could be used for several different occasions.  Once again I had seen a picture posted on Facebook that inspired me to make some of Susan's Pom Pom Dahlias.   Look around there are so many places to find inspiration for a card.  Here is the inspiration picture. Here is how I created my card. Card base 6" X 6" - Craft Perfect White Card Base used here. Cut colored cardstock 5-3/4" square attach to card front using Clear Double Sided Adhesive. Cut White Soft Finish Cardstock 5-1/2" square attach to card front using Clear Double Sided Adhesive. Spellbinders Grand Decorative Ovals - smallest was used to cut a decorative oval from white Soft Finish Cardstock. Create background piece 3-1/2" X 4" die cut using oval that will fit inside decorative oval then adhere in center using Clear Double Sided Adhesive.  My background piece was photo paper then colored with Brusho Powders. Vase was cut on Cr...

Bachelor Buttons Hello

Image
Hello My Crafty Friends, Wow March 1st spring is around the corner at least I hope it is. Today I have a card for you it was inspired by a picture that I saw on Facebook.  This is the picture.  After Susan did these on her "Live" a couple weeks ago I decided it was time to make my card. Here is how my card was created. Step 1   Create 6" X 6" card base from white Cardstock  or use purchased one which you can find at Tonic Studios.  Cut colored cardstock (light green used here) 5-1/2" X 5-1/2" adhere to card front using Clear Double Sided Adhesive .  Cut white cardstock 5-1/2" X 5-1/2" emboss using embossing folder of your choice. ( Craftwell Delicate Dots used here) then adhere to card front using Clear Double Sided Adhesive . Step 2   Using Tonic Studios Verso Classic Quatrafoil die (2 pieces together) cut white cardstock.  Using white cardstock slightly larger than the Quatrafoil.  Using 2 colors of Nouvo Embellishment Mousse (Spring Gree...

Pink Hydrangea & Feverfew

Image
Hello my crafty friends - Welcome to my blog, Today I have a card for you using Susan's Garden Lace Cap Hydrangea, Feverfew, Frame It Stitched Susan's Rectangle and Galvanized Tub . Here is how I created it. Step 1 Create a piece of background size to be determined by size rectangle used for cut out on card front..  My piece was created using several colors of Distress Oxide Sprays. Step 2   Create 6" X 6" card base.  Cut a rectangle upper left side of card front.  Susan's Garden Stitched Fitted Frame Rectangles were used but any rectangle die would do. Step 3   Cut background piece a little larger than the rectangle opening.  Adhere to back of opening using Clear Double Sided Adhesive . Step 4   Stamp made from Garden Notes Ladder Fern was used with green ink to stamp couple of ferns in area above tub so they would show above tub and flowers. Step 5   Cut 2  Galvanized Tubs with Clear Double Sided Adhesive on back.  Adhere 1 on t...

Nasturtiums & Forget Me Nots

Image
Nasturtiums & Forget Me Nots Hello My Crafty Friend, Today my card is a happier card it is a birthday card for one of my nieces. Tried a little foiling for the background of this card. Susan's older Garden Notes dies were used for the Nasturtiums, Forget Me Nots and Trevi Urn. Step 1 Form 4-1/4" X 5-1/2" card base - I used a yellow cardstock. Step 2 Cut black cardstock 4" X 5-1/4" using a stencil (Stampers Anonymous Mini Bricks used here), Transfer Gel and Foil ( Opal used here) make your background. Adhere to center of card front using Nuvo Adhesive Tape Runner . Step 3 Make a frame from white cardstock using 2 nested rectangles adhere over foiled piece using Nuvo Adhesive Tape Runner . Step 4 Die cut 2 Susan's Trevi Urns from white cardstock with adhesive on the back. Adhere one on top of the other. Color and shade. Shape a bit with your fingers add a couple pop dots on center lower back then adhere to lower center of card. Step 5 Using ...

Pom Pom Dahlia Courage

Image
Hello My Crafty Friends, Back today with an encouragement card for a sweet woman fighting cancer right now. Step 1 Form 6" X 6" card base. Tonic Diamond Corner Dot & Drop die was used for the 4 corners. Diamond Layering dies were used to cut center and frame. 6" X 6" green cardstock attached to back of card front. Step 2 Using Nuvo Vintage Drops - Dusty Rose add drops on corner swirls following pattern. For corners on frame add dots using more of the dusty rose and Nuvo Crystal Drops - Bottle Green . Set aside to dry. Step 3 die cut 1 Susan's Garden Club Pom Pom Dahlia from pink cardstock. Shade center shape and assemble using Nuvo Deluxe Adhesive. Step 4 Susan's Garden Notes Jasmine flowers were cut, shaded, shaped and assembled. Step 5 Tonic Verso Essentials Fallen Leaves die set was used to cut the long leafy branches then shaded and shaped. Step 6 Arrange your flowers and leaves at bottom of card front using Nuvo Deluxe Adhesive...

Hellebores in Tin

Image
Hello my crafty friends welcome to my blog. I do hope that your start to 2020 has been going well. Today I have a card that I created for a sweet friend's birthday. Step 1 Using Susan's Garden Holly & Berries dies set cut stems from brown card stock then add berries using Nuvo Crystal Drops Berry Red set aside to dry then repeat on back side. Step 2 Form card base by cutting white card stock 10" X 7" score at 5" fold on score line card will be 5" X 7". Step 3 Emboss card front Step 4 Die cut oval from water color paper. Using Distress Oxide Sprays of your color choice add to oval. Spray with Nuvo Glitter Mist . Once dry adhere to card front using Nuvo Tape Runner . Step 5 From white cardstock die cut 2 Susan's Garden Helleoborus shade and shape. Shade and shape leaves. Step 6 Die cut 2 Susan'sGarden Galvanized Bucket from gray cardstock which has double sided adhesive on back. Because I want more of cylinder shape I tri...

Basket of Holly and Berries

Image
Welcome my crafty friends, Here today with another card I have had down for a while so not a lot of detail. Susan dies are available on Create & Craft for 1st 30 days then will be available from Tonic Studios so be patient they are coming. Today I have used Susan's Garden Gathering Basket (love that the die set comes with both the metal tub and the basket) along with her Holly and Berries. Another 6" X 6" card base from colored cardstock.  White cardstock cut 5-1/2" square then embossed. Basket cut from white cardstock twice adhere on top of each other then colored with alcohol markers adhered to card front. Made a bunch of Holly leaves and Berry Branches.  When berries are involved that is always my first step so that they will have time to dry completely while I am doing everything else.  Berries were done using Autumn Red Nuvo Drops on both sides as Susan does.  Holly cut from green cardstock then shaped and glazed.  Added to basket using Nuvo Dexluxe Adh...

Tub of Spider Mums

Image
Welcome my crafty friends, Susan's new dies are so much fun.  Several of my cards have been done for a while hence I do not have all the particulars that I did as I was having so much fun playing with the dies I forgot to write info down.  Going forward I will try to do better but I get playing and get lost in what I am doing. Today my card uses Susan's Garden Spider Mum , Tub and Japanese Painted Fern .  Susan is now with Tonic Studios and boy do they have lots of wonderful product. The Tonic 6" X 6" white card base is used then colored cardstock cut 5-3/4" square added to card front.  From white 5-1/2" square cardstock a circle was cut in upper left of the piece.  You can use any background behind the circle but what I have used was an actual picture printed on white cardstock of my little building (which we call the basket shop as I use to make baskets there). My tub was cut twice adhered together then colored with Copic markers and metallic rubs th...

Columbine on Stained Glass

Image
Welcome my crafty friends, Another card using Susan's new release with Tonic .  Today I have featured the Columbine and one of my favorite perennials these are 2 of the colors I have. Tonic's 6" X6" white card base layered with green cardstock 5 - 3/4" square.  White cardstock cut 5-1/2" square the upper corner was cut using a die from my stash and bottom edge was cut with old Martha Stewart Punch.  Before adding to card front I cut a piece of white cardstock that was a little bit larger than the stained glass cut out.  Distress Oxide Sprays were used to color background then attached behind the cutout.  Add to card front. Using the new Susan's Garden Columbine die 5 flowers were cut from white cardstock then colored with Copic Markers.  They were shaped and put together using Nuvo Deluxe Adhesive . From green cardstock Japanese Painted Ferns were cut,color, shape adhere to right side of card front.  Add some berries (mine are old berry branches I ...

Diamond Survivor

Image
Hello my crafty friends, It has been a couple months since I last posted time has flown by. As a lot of you know Susan Tierney Cockburn has joined Tonic Studios and yesterday they had a launch of her 1st release of her beautiful flower dies  under the Tonic Studios Logo on Create & Craft .   I am so excited to once again be a member of Susan's Design Team I feel honored to represent her. My post today features a few of those dies. As you know October is Breast Cancer Awareness month and so my card was designed for a friend that is a breast cancer survivor. My card is 6" X 6" I used Tonic's card base. Embellishment Mousse (Spring Green) was used along with their Stencil Twisting Circles to create background in center. Pink cardstock was cut 5-3/4" square and Diamond was cut in center.  Next white cardstock was cut 5-1/2 square and Diamond was cut in center of it using next larger size.  These were layered over the background on card front. Japanese ...