Witch's Brew
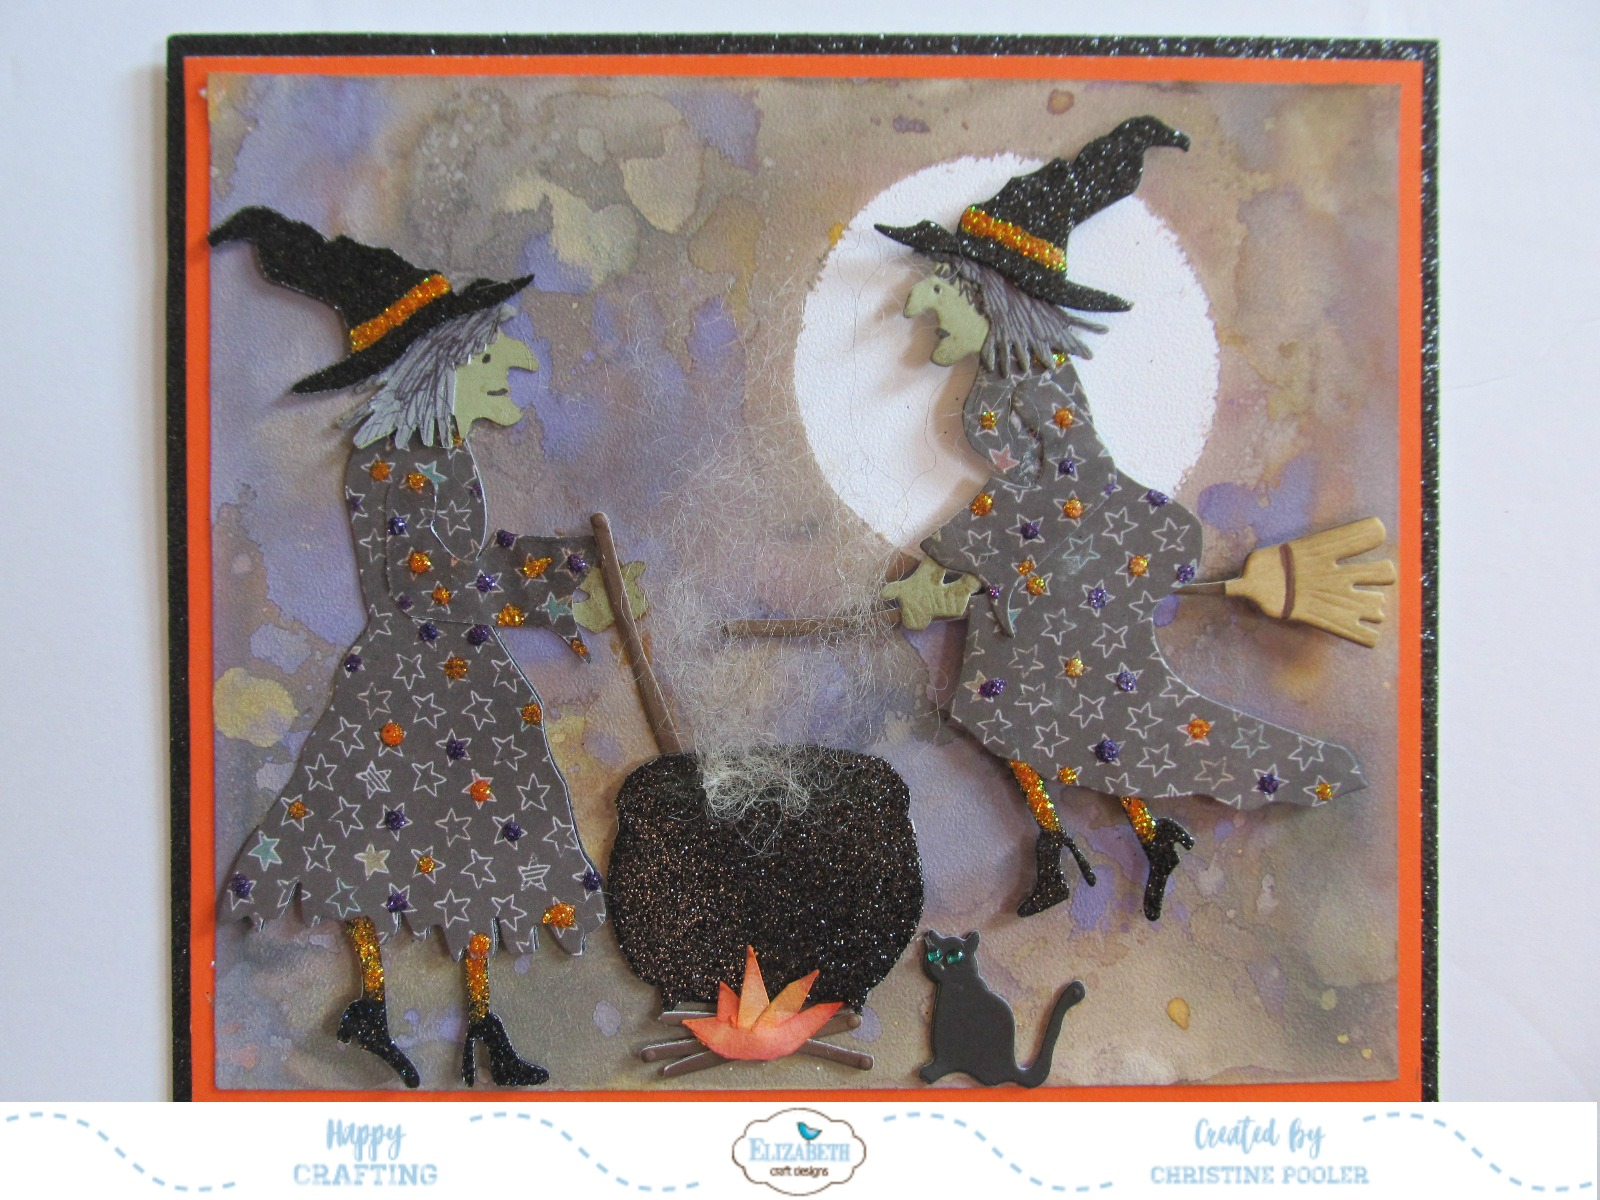
Hello my crafty friends welcome to my blog today. Well it is officially fall and Halloween is fast approaching so my post today is a Halloween card that I have designed using Susan's CountryScapes Build A Witch die set. There are 2 witches in the die set and I could not decide which witch (hehehe) to use so I decided to design a card that used both.
Here is how the card was created.
- Card base is black glitter paper cut 12" X 7" scored at 6" folded on score line to form 7" X 6" card so both witches would fit.
- Cut orange cardstock 6-3/4" X 5-3/4" adhere to card front using Clear Double Sided Adhesive.
- Cut white Soft Finish Cardstock 6-1/2" X 5-1/2" . Cut circle approximately 2-1/2" from scrap paper (just a mask for moon) add removable adhesive to back place on white cardstock where you would like your moon to be. Using Distress Oxide re-inkers place a few drops Spiced Marmalade, Wilted Violet, Wild Honey and just a couple drops of Black Soot onto craft mat spritz with water tap cardstock into ink turning paper in different directions to cover entire piece. You may want to do this in stages drying with heat gun in between so as not to muddy too much. Give it a quick spritz of water. If you do not have re-inkers you can certainly sponge colors on you will just have a slightly different look. Remove your mask let dry. When completely dry attach to card front using Clear Double Sided Adhesive.
- Using CountryScapes Build A Witch die set cut 1 of each witch body then cut 2 each of everything else from black cardstock (this just adds dimension) then cut witch bodies from patterned paper (NOTE: when cutting body of standing witch you must flip paper to make her face the opposite way). The hats, legs / shoes were cut from black glitter paper. Orange Stickles were used on leg areas, band on hats and some dots on their dresses. Purple Stickles was also used on their dresses make sure this dries completely before assembling. I assembled the witches before placing onto card front. The broom cut approximately 5 times from brown cardstock then cut 1 broom part only from yellow cardstock. Adhere 1 broom on top of the other then add just the yellow broom part on top for flying witch's broom adhere 1 on top of other cutting away the broom part leaving just the handle for stick in caldron. The remaining 3 handles cut into sticks for fire.
- The cat was cut twice from black cardstock using CountryScapes Critters 1 die set. Adhere 1 on top of other. Use tiny green gems for eyes.
- For the caldron I had a Halloween window cling setwith caldron in it that I traced around onto black glitter paper then "fussy" cut. Fire was hand drawn onto white cardstock cut out then colored to look like flames. Logs were cut from brown cardstock using the broom handle die then cut into pcs.
- Build your scene onto card front using Kids Choice Glue to adhere. For the flying witch pop dots were used for extra dimension. For the steam coming from caldron wool roving was used (I do a little rug hooking) but you could use any fiberous material that you can pull out wispy.
Hope you have enjoyed this simple card tutorial and that you will make your own version of this card.
Be sure to visit Elizabeth Craft Designs to for all their great products!
Until next time .........Happy Crafting!
Christine

.jpg)

I really can't get into Halloween, but it is a very creative time and you have done well in yours. thanks for sharing.
ReplyDeleteThank you - I do not do many Halloween cards but Susan has such cut die sets.
ReplyDeleteI think that would be the dardest thing about being on a DT. Having to promote something you would not necessarly have bought yourself. Just my crazy thinking.
ReplyDeleteWell it certainly puts me outside my comfort zone at times. The flowers are really my passion!
ReplyDeleteNothing better than Halloween for crafts. This is certainly a good one. Thank you.
ReplyDelete