Looking Through My Window
Hello everyone thanks for stopping by today. Fall in Maine is absolutely gorgeous such colorful landscapes that we have had here in Maine this fall.
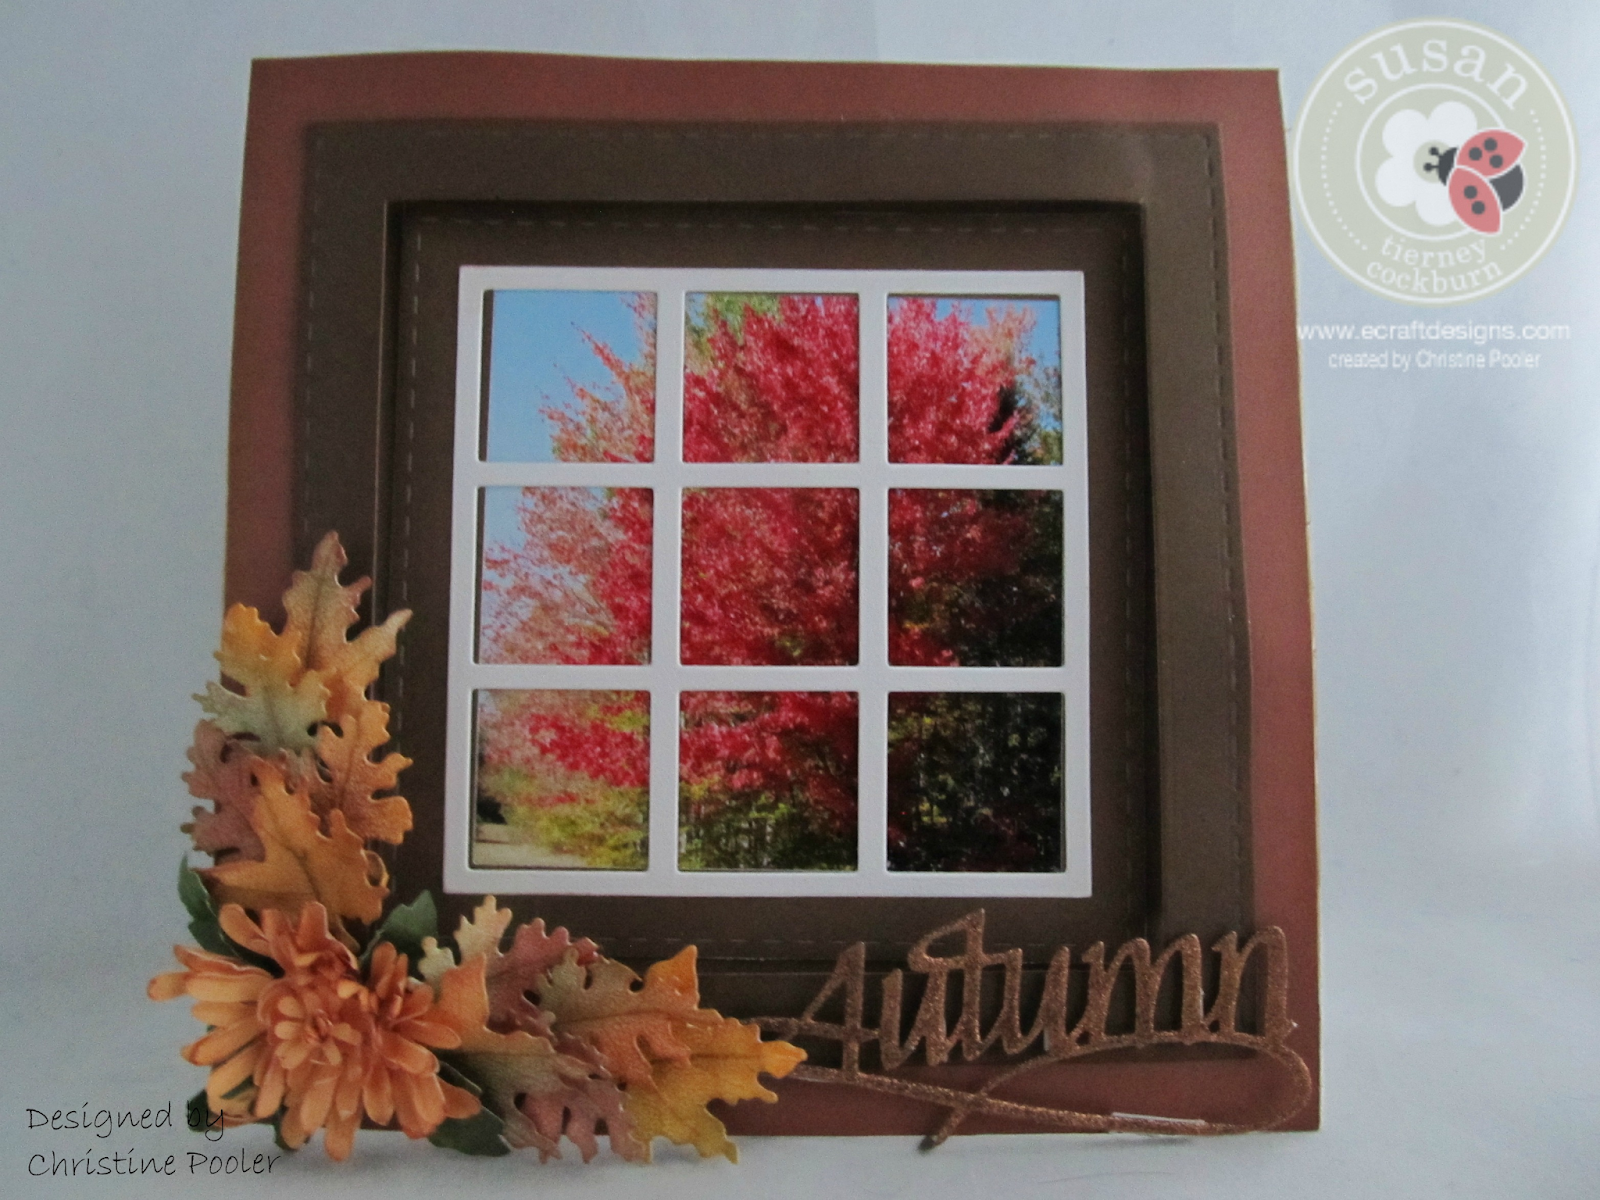
My post today is a window card using an actual picture I took looking out my kitchen window. What a pretty site to behold while washing dishes. Using Susan's Garden - Garden Patch Woodland Leaves, Garden Notes - Chrysanthemum and Garden Patch 1" .
Here is how I did it!
- Cut white soft finish cardstock 6" X 12" score at 6" fold on score line this forms a 6'X6" card.
- Measure in 3/4" from edges all around card front making light pencil marks - drawn a square.
- Next measure in 1/4" from lines you just drew making light pencil marks and draw a square.
- Score on all lines.
- Cut a large X using an Exacto knife cutting on diagonal outside corner to outside corner.
- Fold the outside score lines inward crease well then fold second set score lines towards center forming window.
- Cut 4-1/2" square white cardstock adhere to back side of window applying clear double sided adhesive to the cut triangles.
- Cut 4-1/2" square piece of brown cardstock adhere to inside of window using clear double sided adhesive.
- Using third from largest stitched square die cut 1 square from brown cardstock.
- Cut picture 4" square using clear double sided adhesive attach stitched frame over picture.
- From white cardstock cut frame using Garden Patch 1". Using a clear drying glue such as Kid's Choice Glue put a few dots at corners and along outer edges and adhere over picture.
- Cut a piece of barn red cardstock 6" square. As you did for the card front measure around 3/4" in on all sides then cut out square on these lines. Adhere to front of card.
- Using the largest stitched square die and brown cardstock cut 1 square adhere to front of card around window.
- Using Susan's PanPastels set 1 and 3 and sponges randomly rub fall colors all over white cardstock making sure to cover completely (no white areas). From this cut several leaves using Susan's Garden Patch Woodland Leaves (small oak and maples leaves used here). Place leaves face down on leaf pad and using leaf tool from Susan's Tool Kit put vein lines in all leaves. On the right side pinch together and using ball tool and molding mat giving a little shape to edges by rolling ball over them.
- Using Susan's Garden Notes Chrysanthemum die and yellow cardstock cut 1 flower and cut several small leaves from green cardstock. Shape and assemble flower using Susan's YouTube video as a guide you can find it here.
- Using clear drying glue arrange and attach flower and leaves to lower left corner of window.
- Cover one side of brown cardstock approximately 2' X 4" with clear double sided adhesive. Place A Way With Words - Autumn die face down on adhesive covered side and die cut. Peel off protective covering and coat adhesive with copper Silk Microfine Glitter tapping off extra. Burnish in glitter with finger.
- Cut very narrow strips of foam tape and place on back of die cut adhere to lower right corner of card front.
ECD Supplies:
Susan's Garden Patch Woodland Leaves
Susan's Garden Notes - Chrysanthemum
Susan's Garden Patch 1"
Els Stitched Squares
Suzanne Cannon 4 Seasons
Soft Finish Cardstock - White
Silk Microfine Glitter - Copper
Susan's Molding Pad
Susan's Leaf Pad
Susan's 4 pc Tool Kit
Susan's PanPastels Set 1 & 3
Clear Double Sided Adhesive
Kid's Choice Glue
Other
Brown, green, barn red and yellow cardstock
I really hope that this tutorial today has given you inspiration to create your own window card. You can find your supplies for this card at Elizabeth Craft Designs along with many other wonderful products.
Thanks again for stopping by today and until next time - Happy Scrapping!
Christine

.jpg)

Comments
Post a Comment