In The Woods
Hello Everyone welcome to my blog. Today my post is something a little different. Instead of making a card I decided to make something decorative and use some of Susan's CountryScapes die sets. The first picture is shown without the glass dome so it is easier to see.
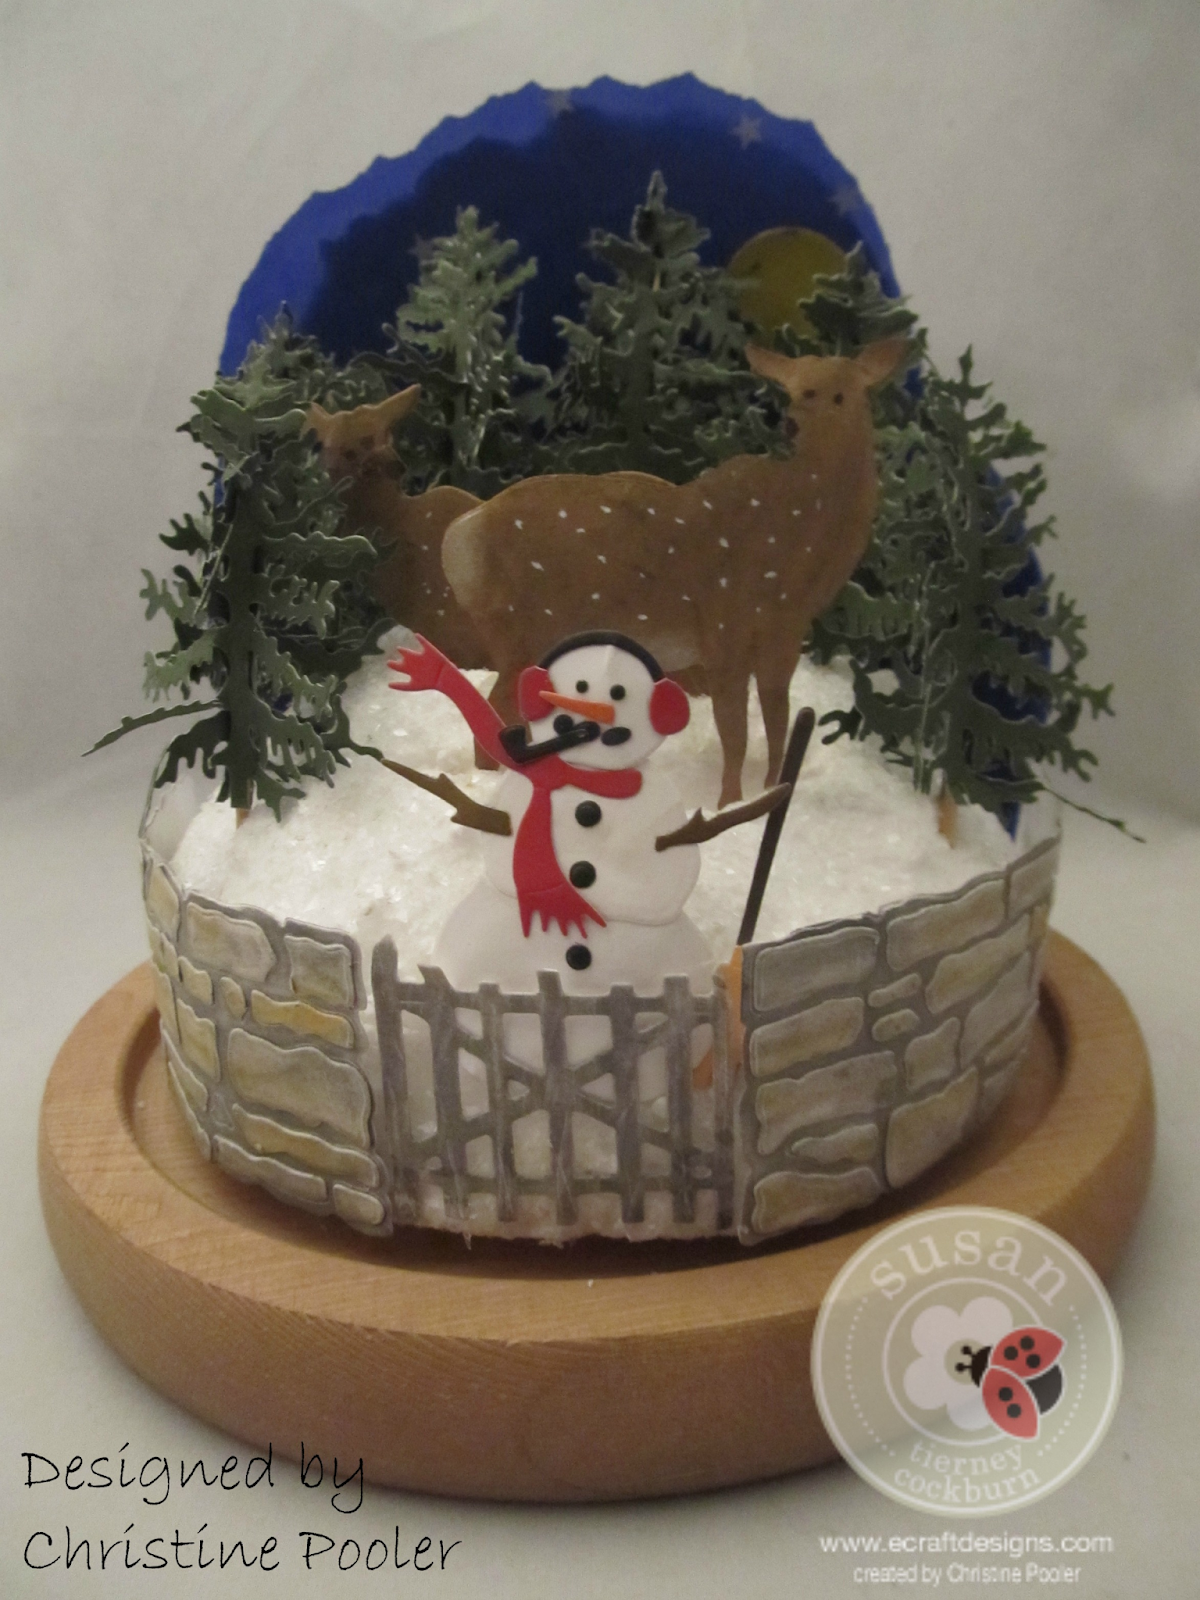
This is a picture with the glass dome over it photo is not great but it was very hard to photograph due to the glare on the glass.

Here is how it was constructed
- Cut 30 - 36 trees (I cut just the top 3-3-1/2" of tree) from green cardstock using Susan's CountryScapes Holiday Evergreens & Trimmings die set. Fold up all the branches on each tree add Kid's Choice Glue to the back of tree adhere to tooth pick.

- add 3 trees to each tooth pick which gives you a dimensional tree.
- You should have 10-12 dimensional trees when done.
- Cut 4 deer using light brown cardstock and deer die from Susan's CountryScapes Critters 3 - 2 of the deer should but cut from brown cardstock that has Clear Double Sided Adhesive on 1 side and 2 cut from just cardstock. Adhere deer together so you have 2 deer.Lay deer face down on molding mat and use large ball tool to shape the deer a little. Shade deer using Susan's PanPastels Set 3 (dark brown & white) . For spots on deer use white gel pen.
- Cut 1 snowman and accessories using Susan's CountryScapes Build A Snowman die set. Put snowman together using Kid's Choice Glue. Lay snowman face down on molding mat and shape a little using large ball tool.
- Cut 2 stone walls and 1 gate use Susan's video to shade and build your walls.
- Cut 5" Styrofoam ball in half using a knife. Cut pieces off all over ball half so that it is not too smooth. Cut a couple of slots for deer placement. Using a clear drying glue and a brush apply all over ball except around the very bottom all the way around. Sprinkle Diamond Dust over the glue shake off the excess.
- Cut 1 piece of white cardstock and 1 piece of blue vellum with stars at 6" square. Attach the 2 pieces together using Clear Double Sided Adhesive along bottom edge on 1 side. Tear along sides and top edges of both papers adjusting height to fit under glass dome. Using Kid's Choice Glue attach this paper to back of ball using tiny straight pins to hold in place.
- Glue stone wall and gate to front of ball using Kid's Choice Glue.
- Add deer to slots with a little glue on their hooves to secure them into the slots.
- Stick trees into ball behind and ob sides of deer as desired.
- Tuck snowman behind stone wall securing with a little glue.
- Add yellow vellum circle for moon.

Elizabeth Craft Designs Supplies
Susan's CountryScapes Build A Snowman
Susan's CountryScapes Critters 3
Susan's CountryScapes Woods 4 Holiday Evergreens & Trimmings
Susan's CountryScapes New England Stone Wall & Gate 3
Susan's PanPastels Set 3
Kid's Choice Glue
Clear Double Sided Adhesive
Other Supplies
Cardstock - white, light brown, green, red, black
Blue vellum with stars
small piece of yellow vellum
Diamond Dust
5" Styrofoam Ball
Fab Lab Glass Dome with wood base
tooth picks
I do hope that you have enjoyed my tutorial today and will try your hand at making your own. Be sure to visit Elizabeth Craft Designs for great supplies.
Until next time Happy Scrapping!
Christine

.jpg)
.jpg)
One word: awesome!
ReplyDelete